There has been a lot of hype regarding n8n, and we have had multiple people come up to us and ask if WhatsApp workflows can be automated on n8n, and if yes, how exactly? We searched up the web but saw that there wasn't much step-by-step information available on the same. Hence, we built a workflow ourselves to show you how it's done.
This guide shows you how to build a working WhatsApp automation in n8n. You will set up WhatsApp Business Cloud from Meta, connect it to n8n, add an AI agent with memory, and send replies back to users on WhatsApp. We have added all steps in such a manner that they are easy to follow. Works on Windows, Mac, or Linux. No code needed.
What you will build?

WhatsApp receiver that catches incoming WhatsApp messages.
An AI agent that reads the message, keeps short chat memory, and generates a reply.
WhatsApp sender that posts the reply back to the user.
A simple safety check that only runs when a text body exists.
A switch you can turn on to keep it running.
What you need?
n8n Cloud account
You can self host, but chat apps usually need SSL and clean public URLs. n8n Cloud saves you that setup.Meta Business access
A Facebook account with access to business.facebook.com and permission to create an app.WhatsApp Business Cloud
We will use Meta’s sandbox test number to start.Model access
OpenAI API key with a few dollars of credit for testing. You can swap to any other model later.
How will the flow look like? (Quick Overview)
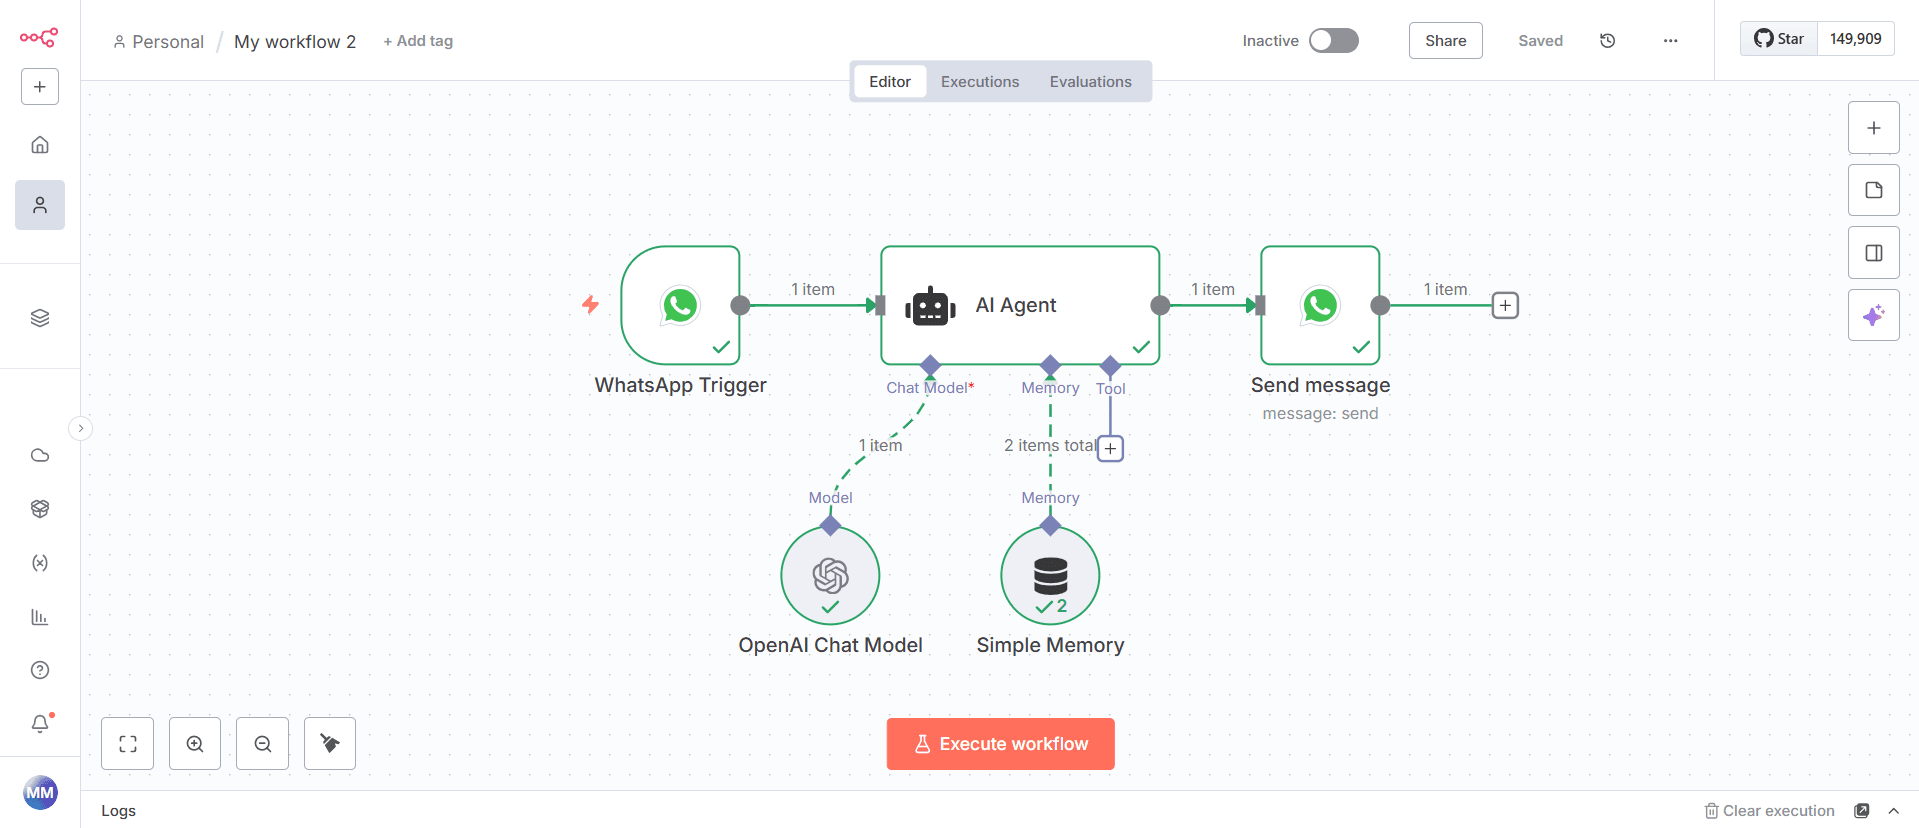
WhatsApp message comes in.
n8n trigger fires and passes the text to an AI Agent node.
Memory node keeps a short window of the chat.
AI output goes to the WhatsApp Send node.
User sees the reply in WhatsApp.
You can add rules, databases, or tools later.
Step 1 - Create a new workflow in n8n
Log in to n8n Cloud & select Create Workflow.
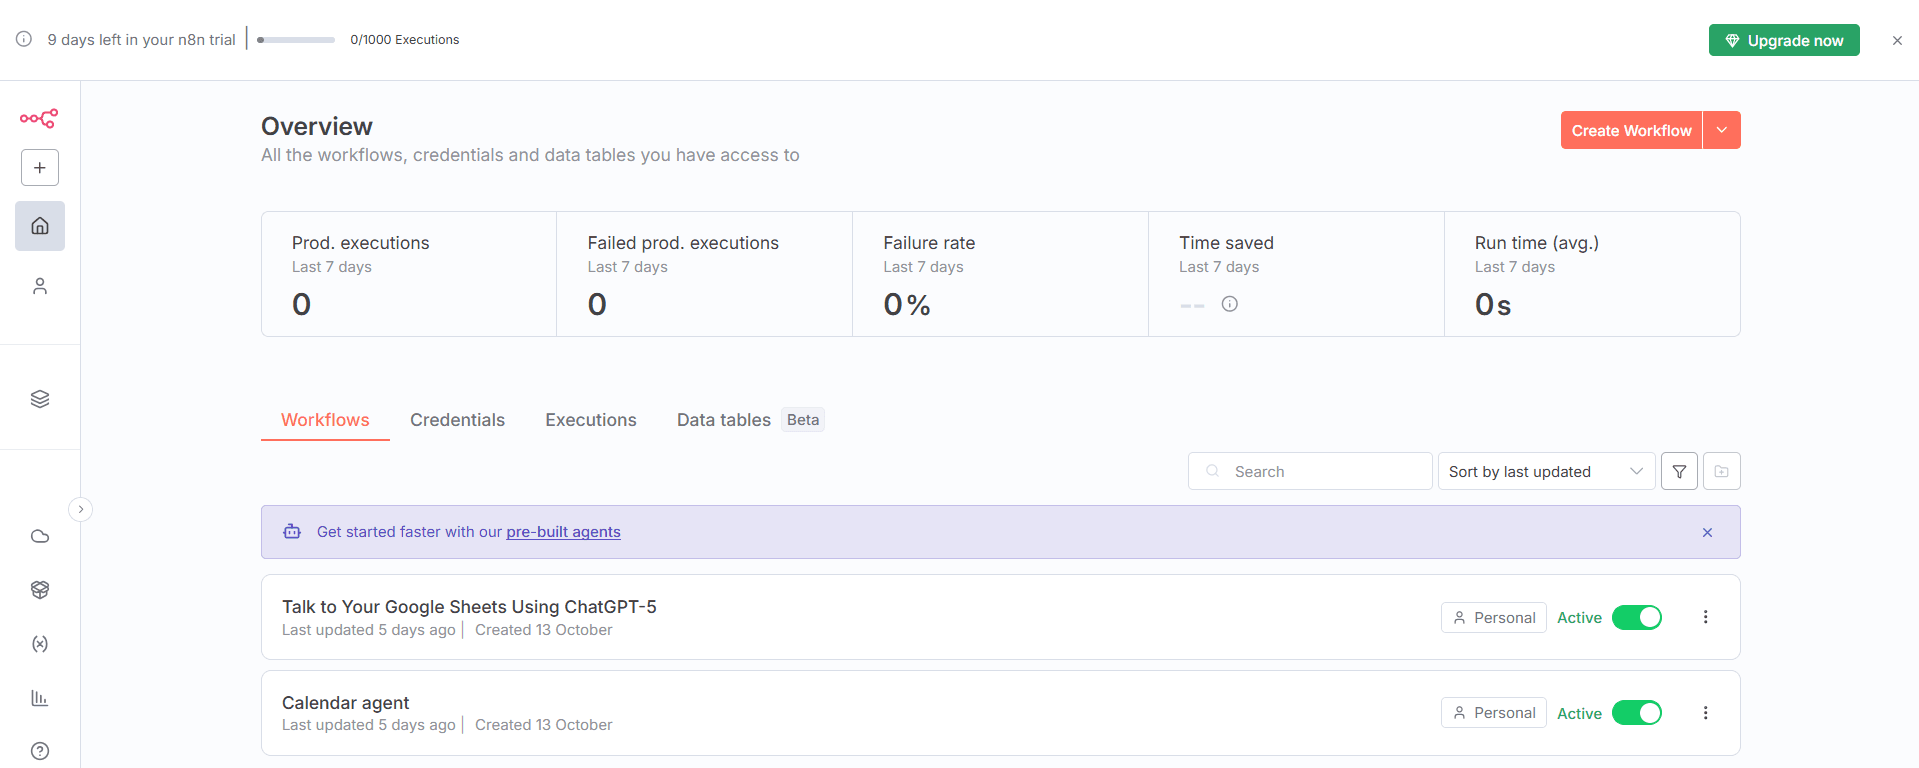
Click New, choose Start from scratch.
Save the workflow with a clear name, for example: “WhatsApp Chatbot”.
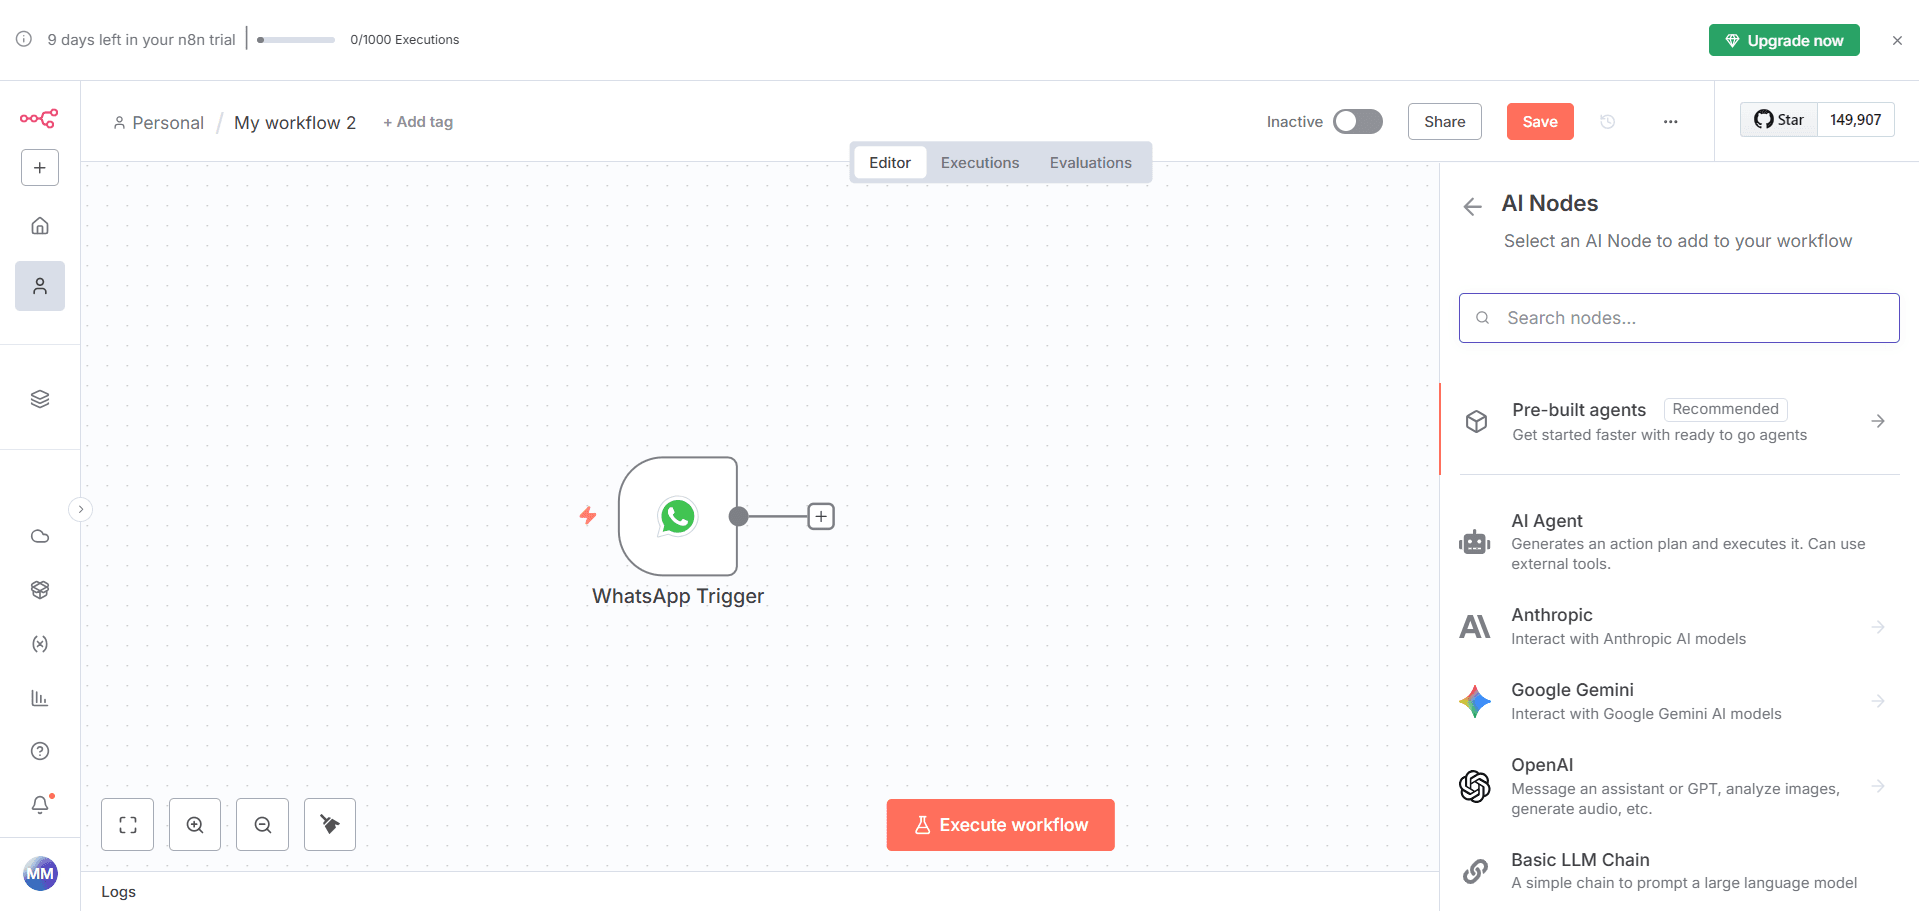
Step 2 - Add the WhatsApp trigger in n8n
Click + then search for WhatsApp Business Cloud.
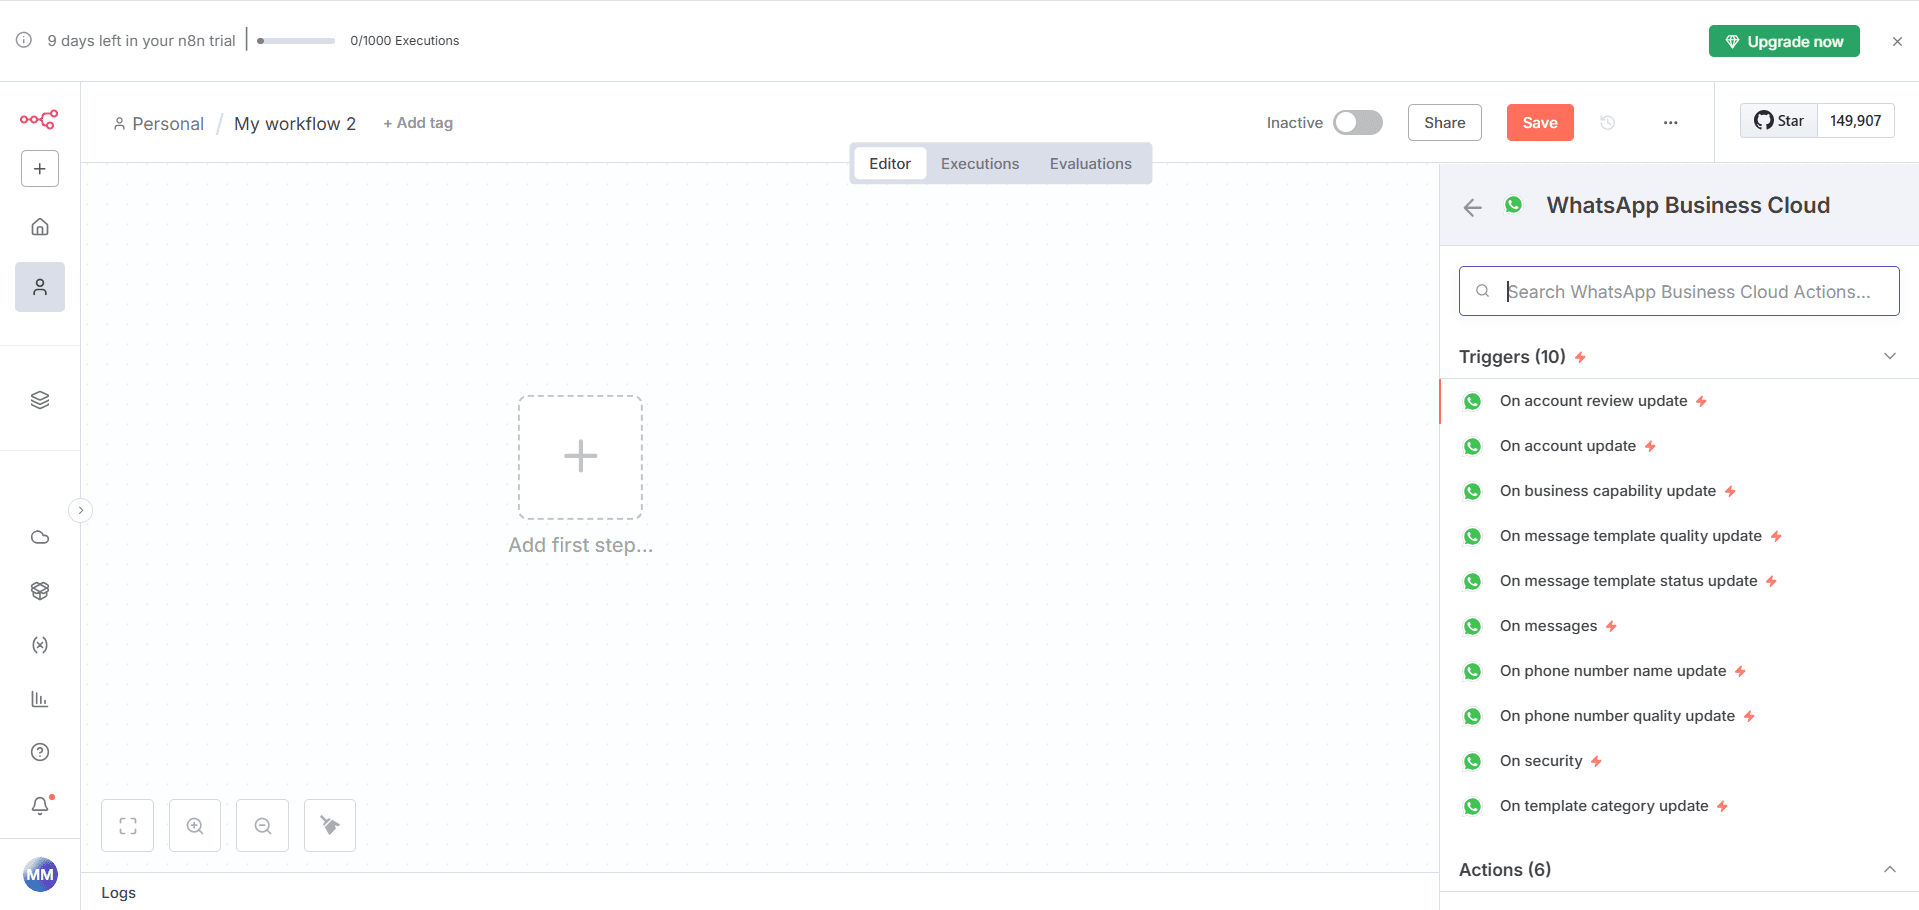
Choose Message. This is the trigger node for incoming messages.
Rename the node to WhatsApp Trigger. We will reference this name later.
Connect credentials for the trigger
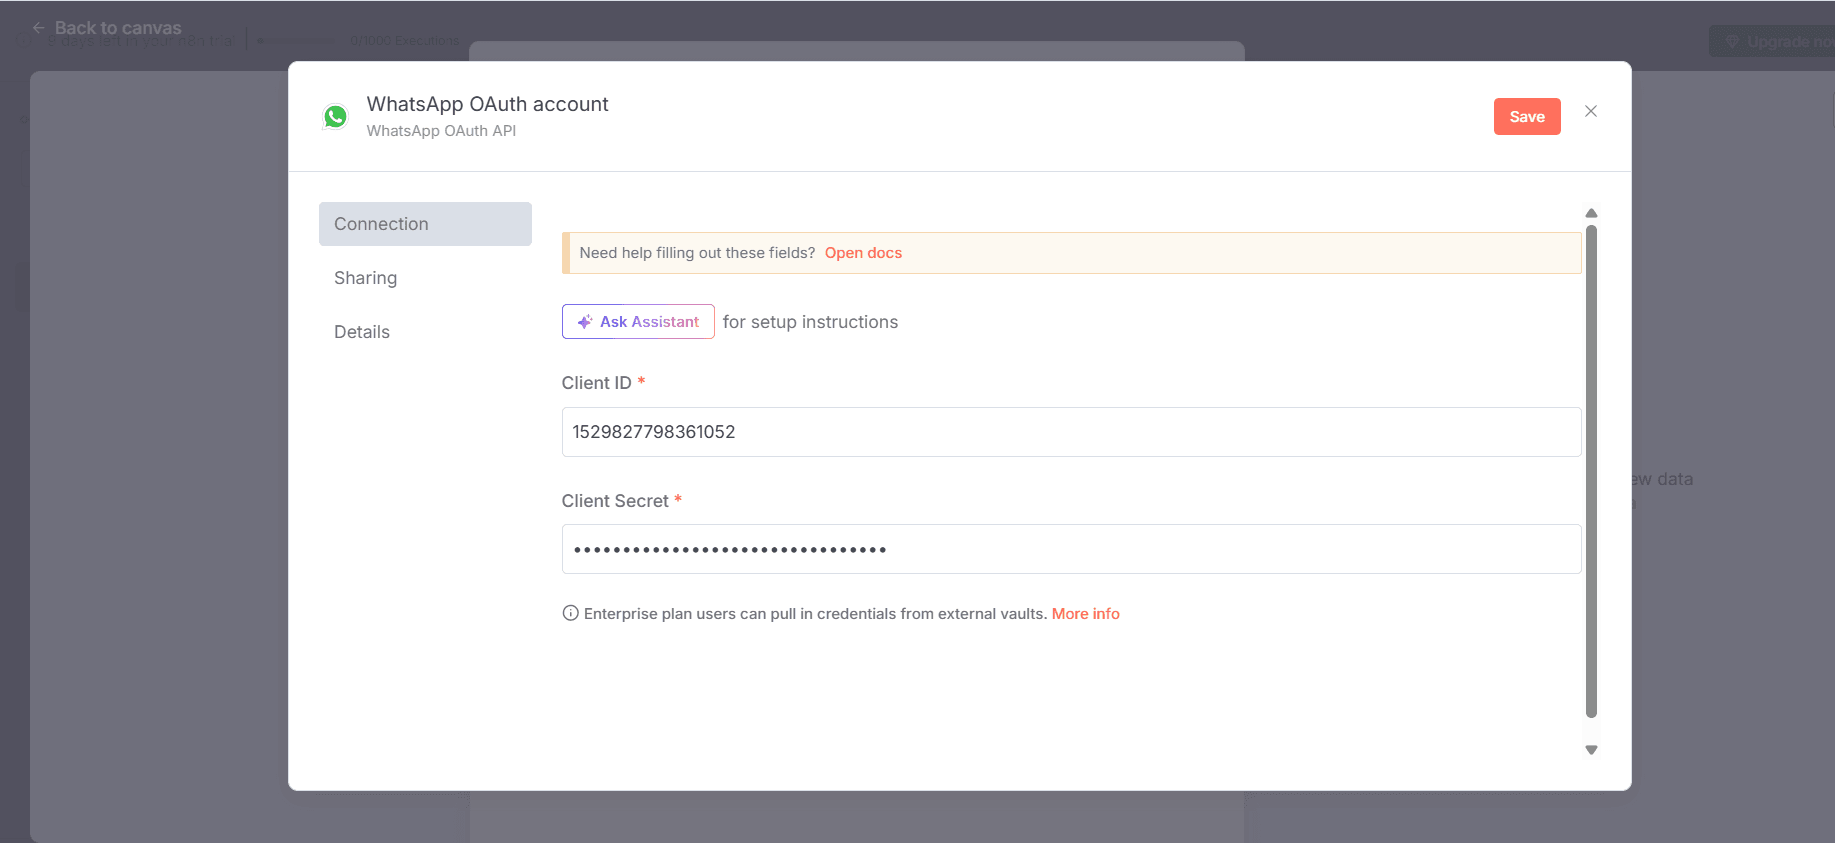
Click Select credential then Create new.
It asks for Client ID and Client Secret.
Get these from Meta:
Go to business.facebook.com and log in.
If you do not have a Business account, click Create business in Business settings.
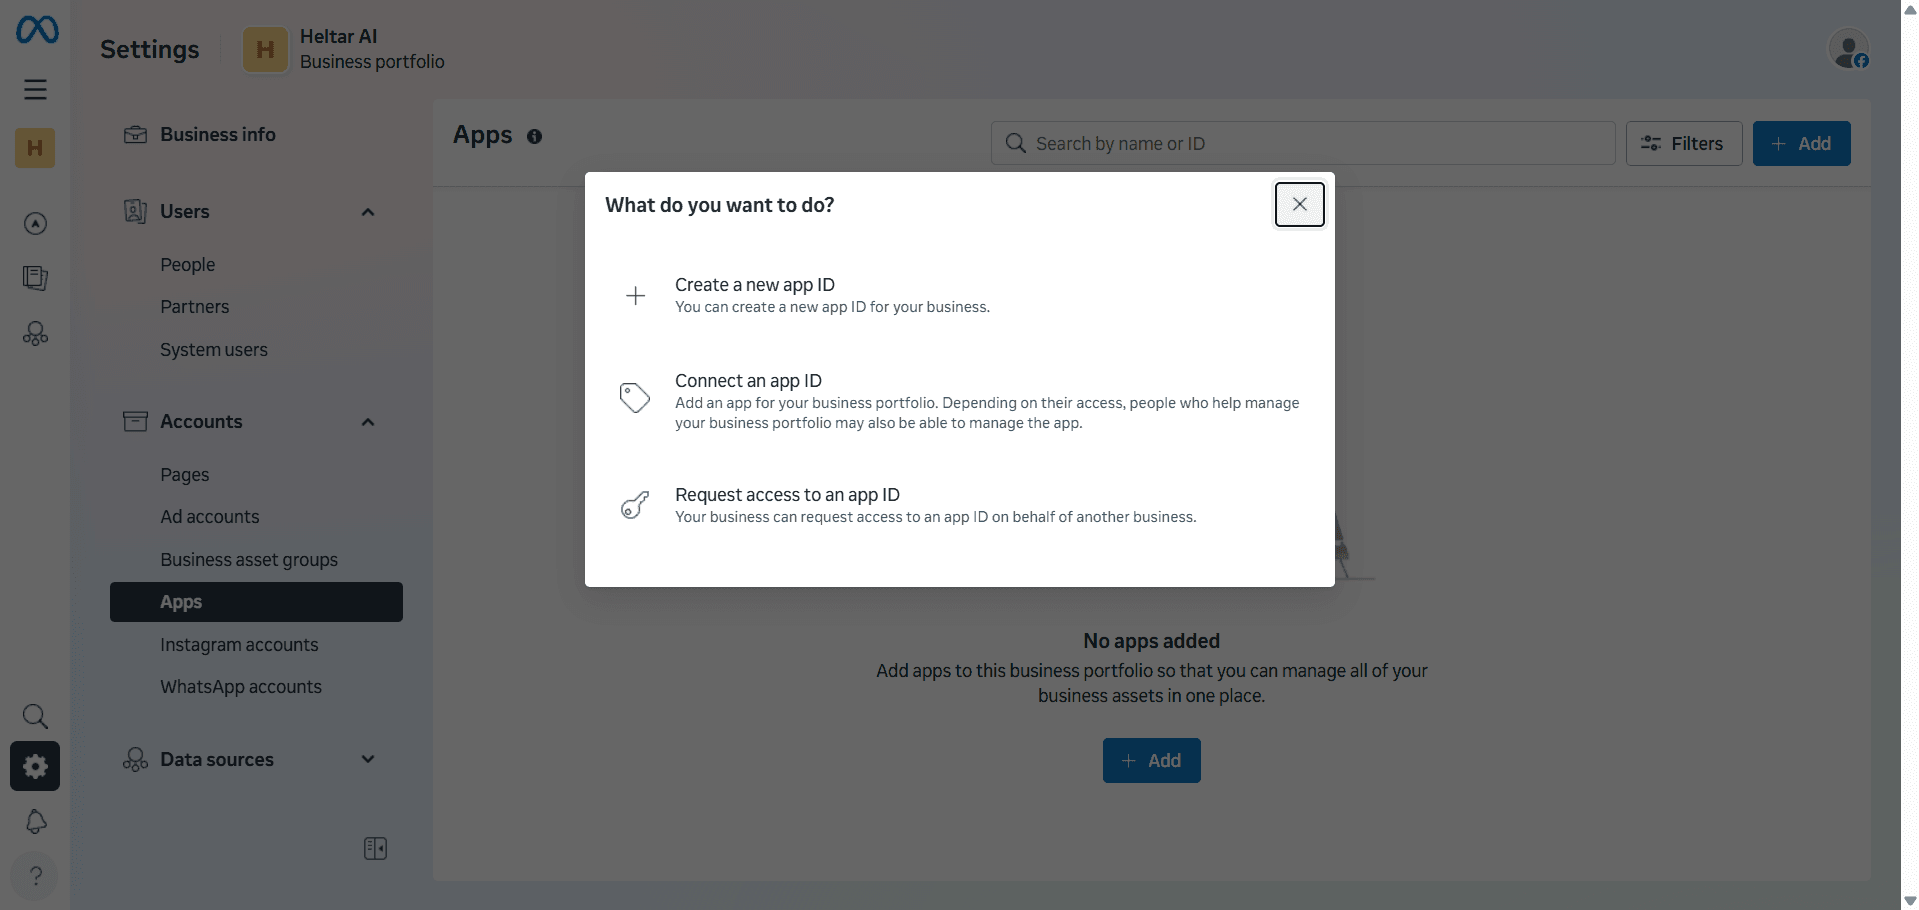
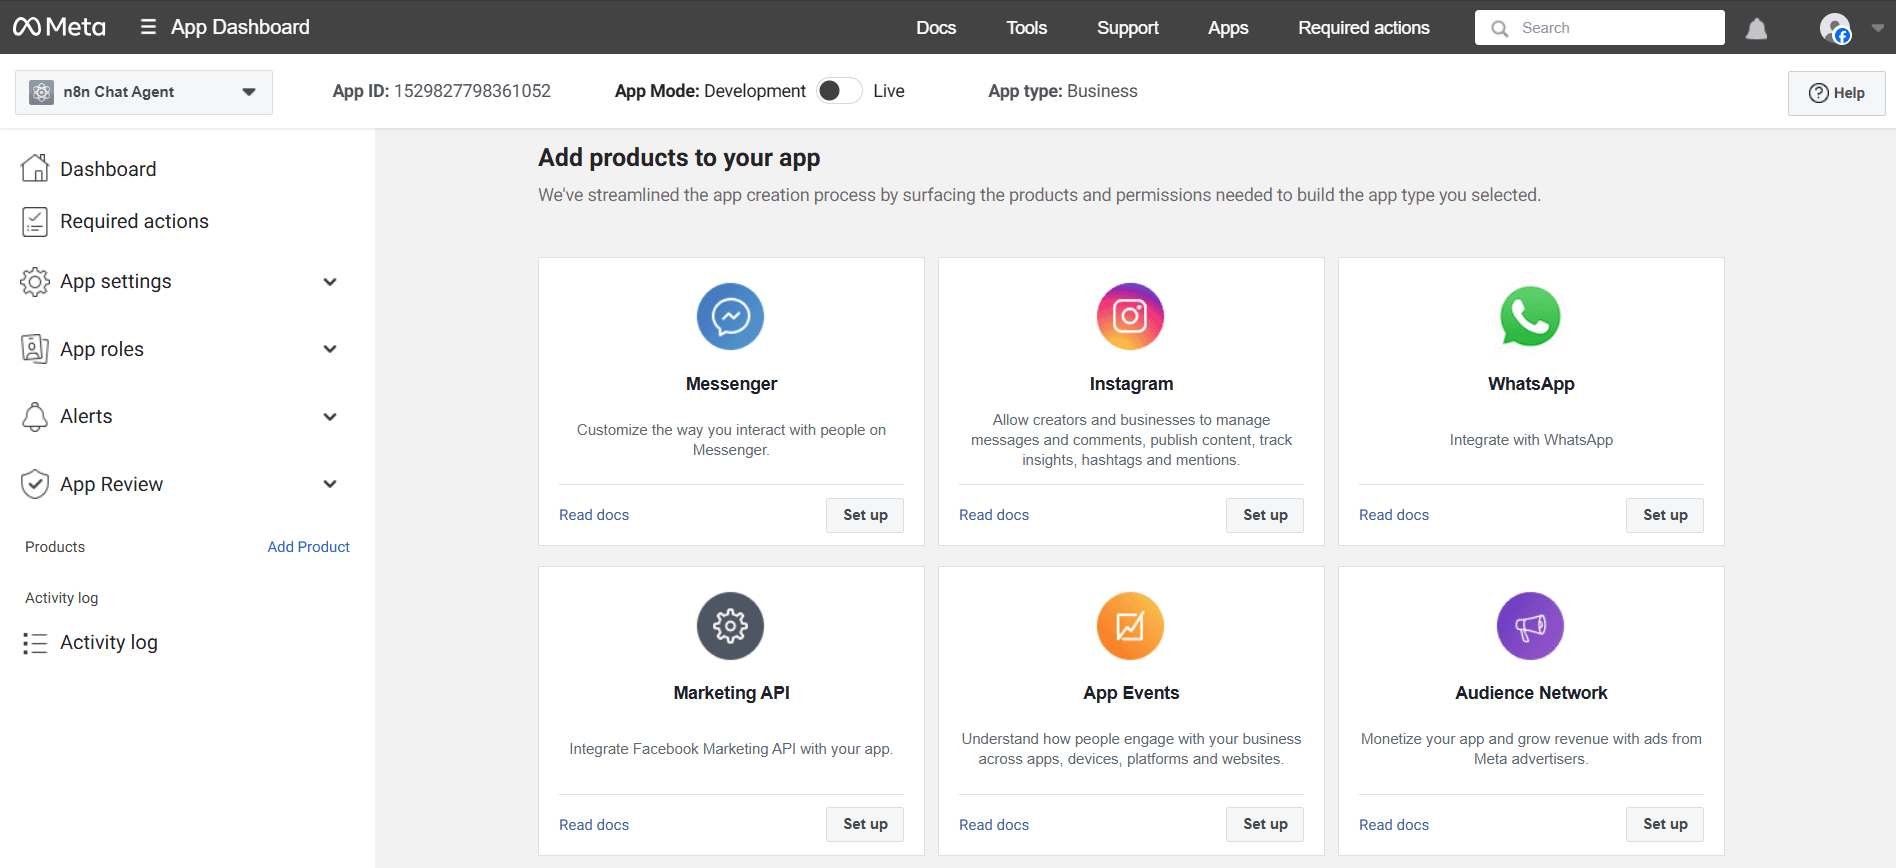
In the left sidebar, under Accounts, click Apps then Add and Create a new app.
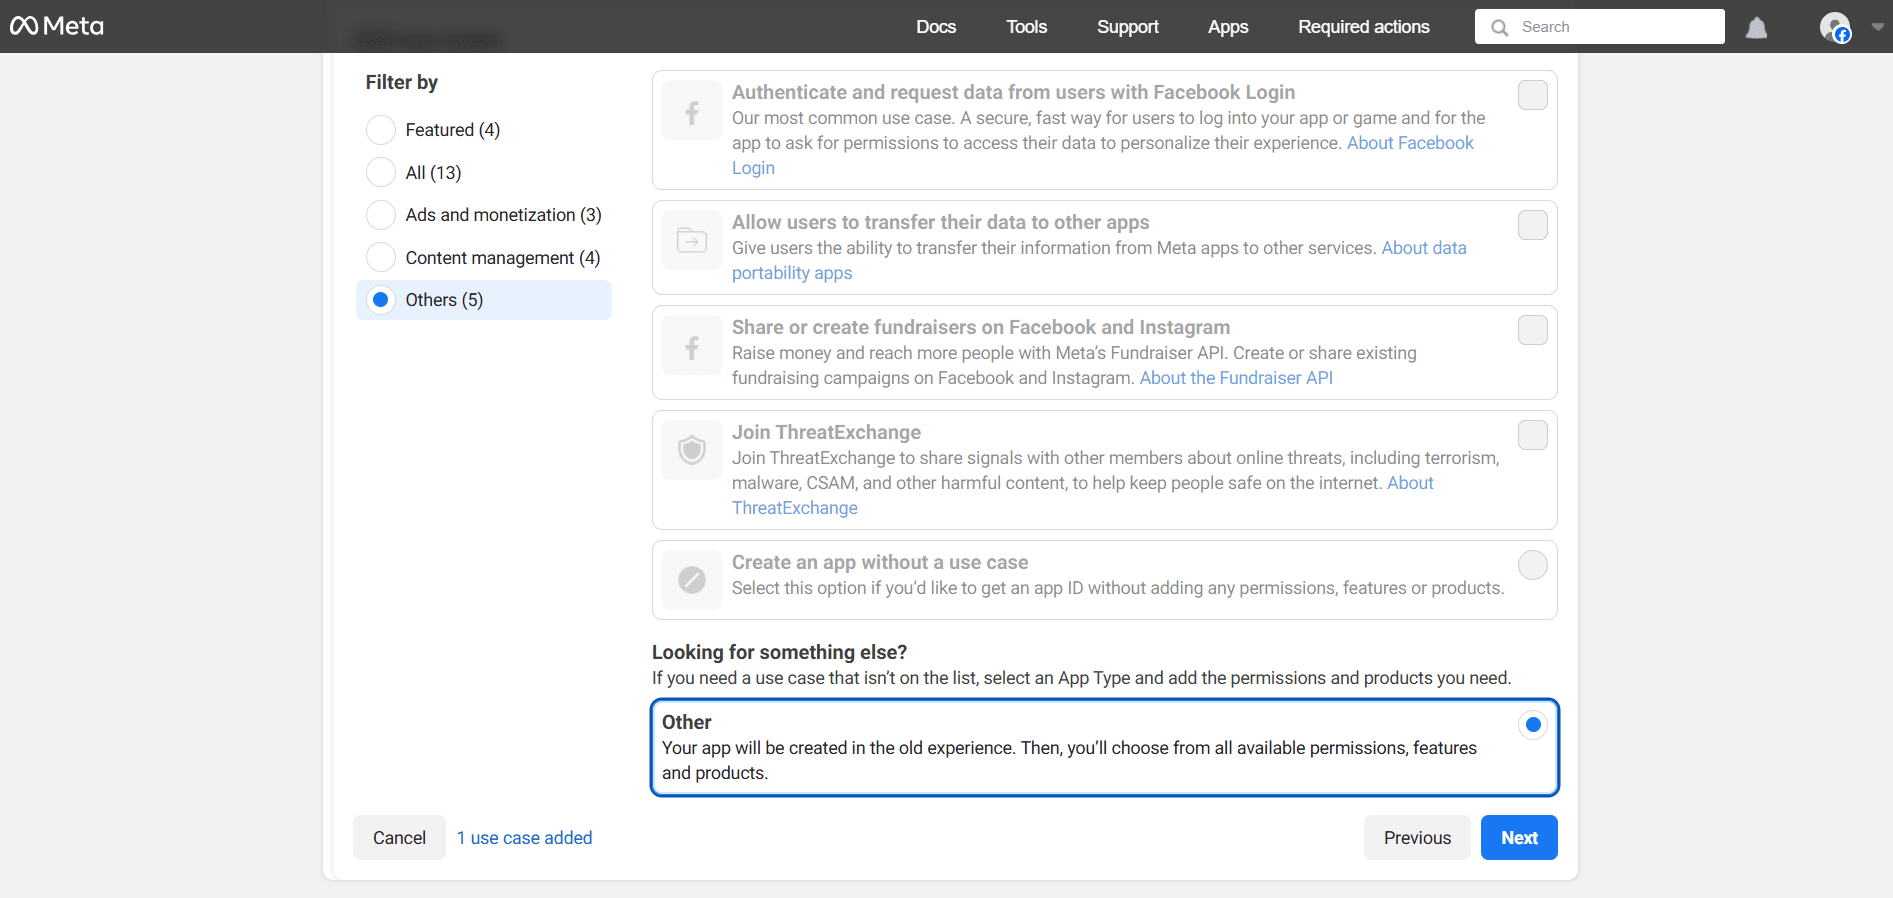
Fill in App Details and On Use Cases, choose Other, then Next.

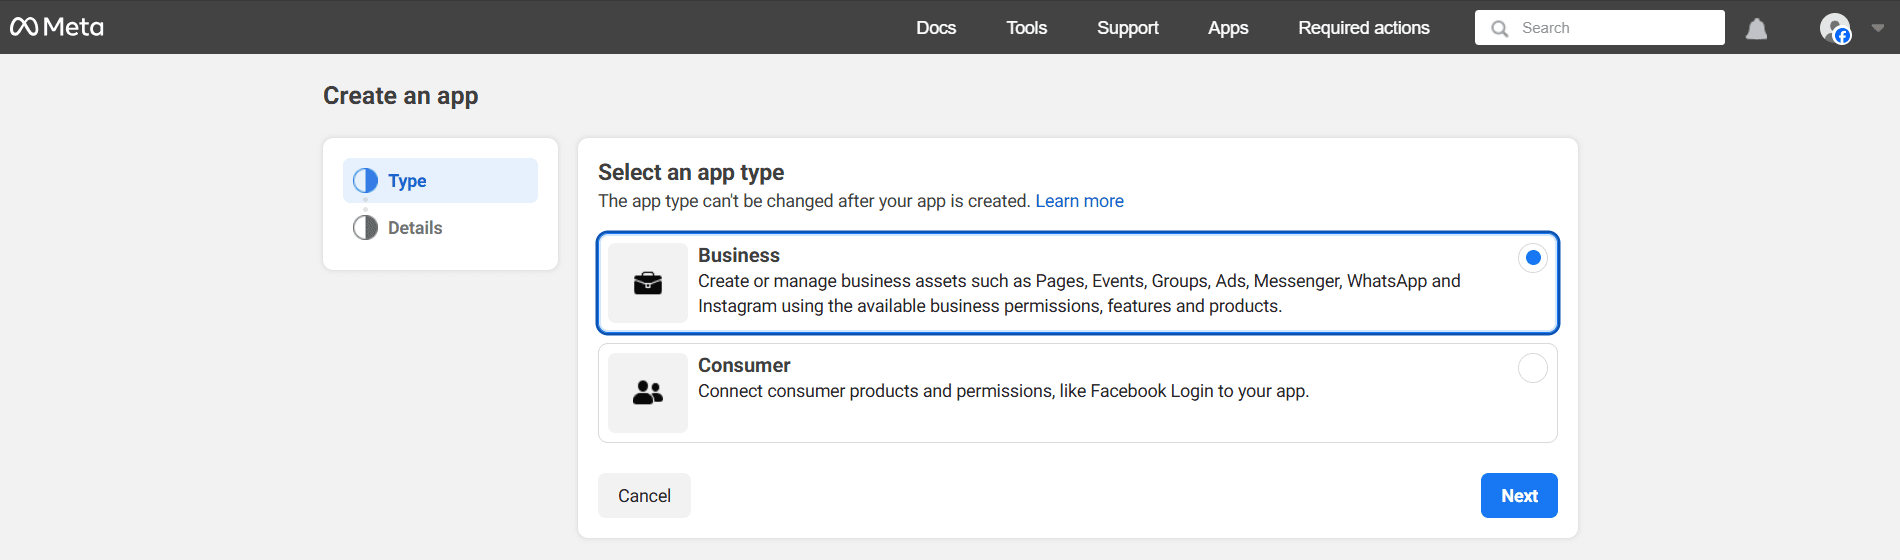
- For App type, choose Business, then Next.
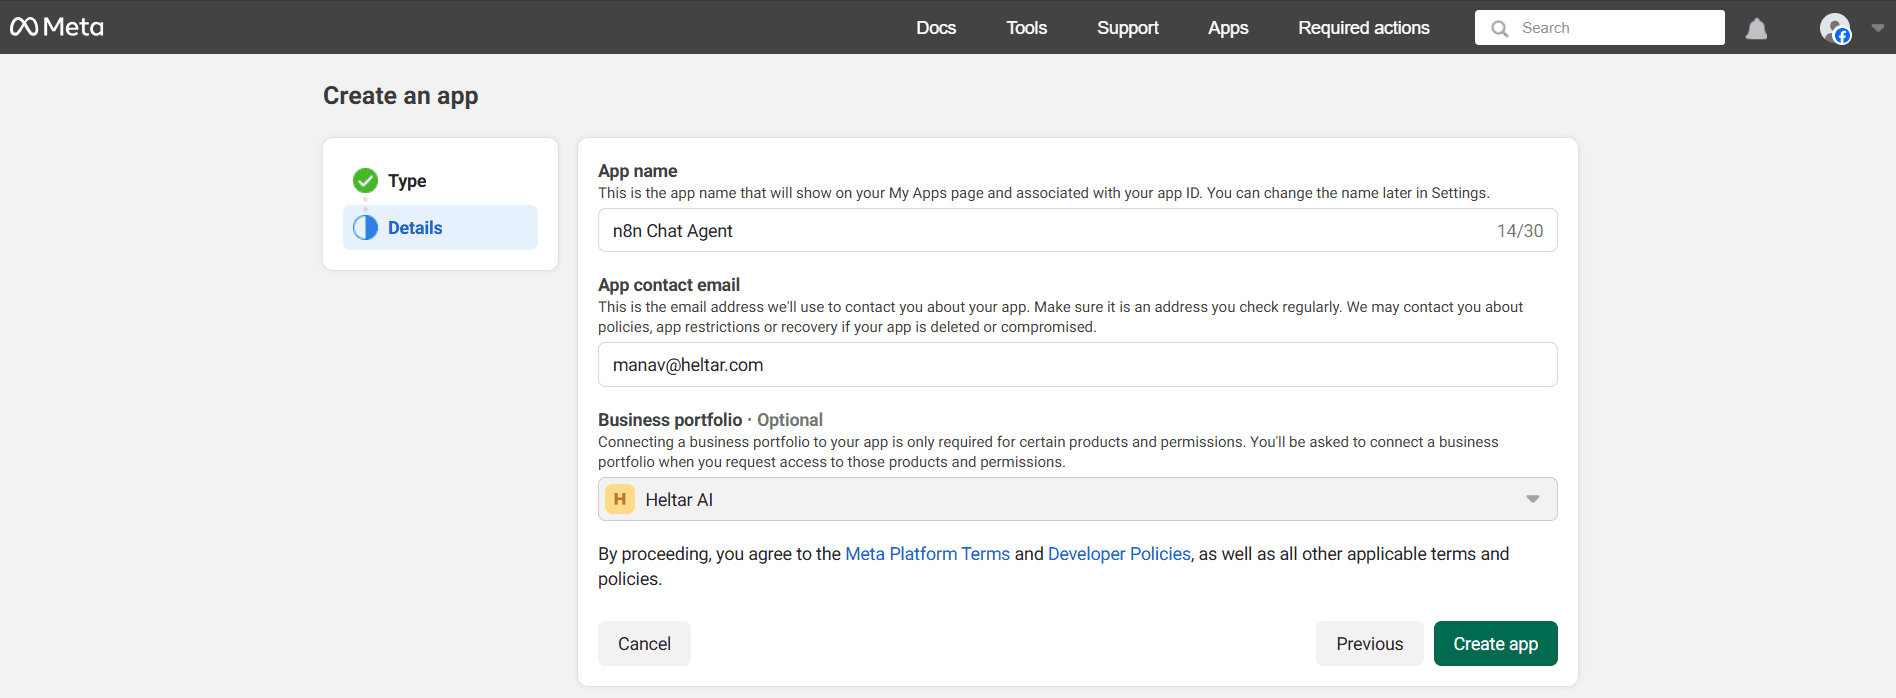
- Name the app, add your email, link it to your Business, and Create app.
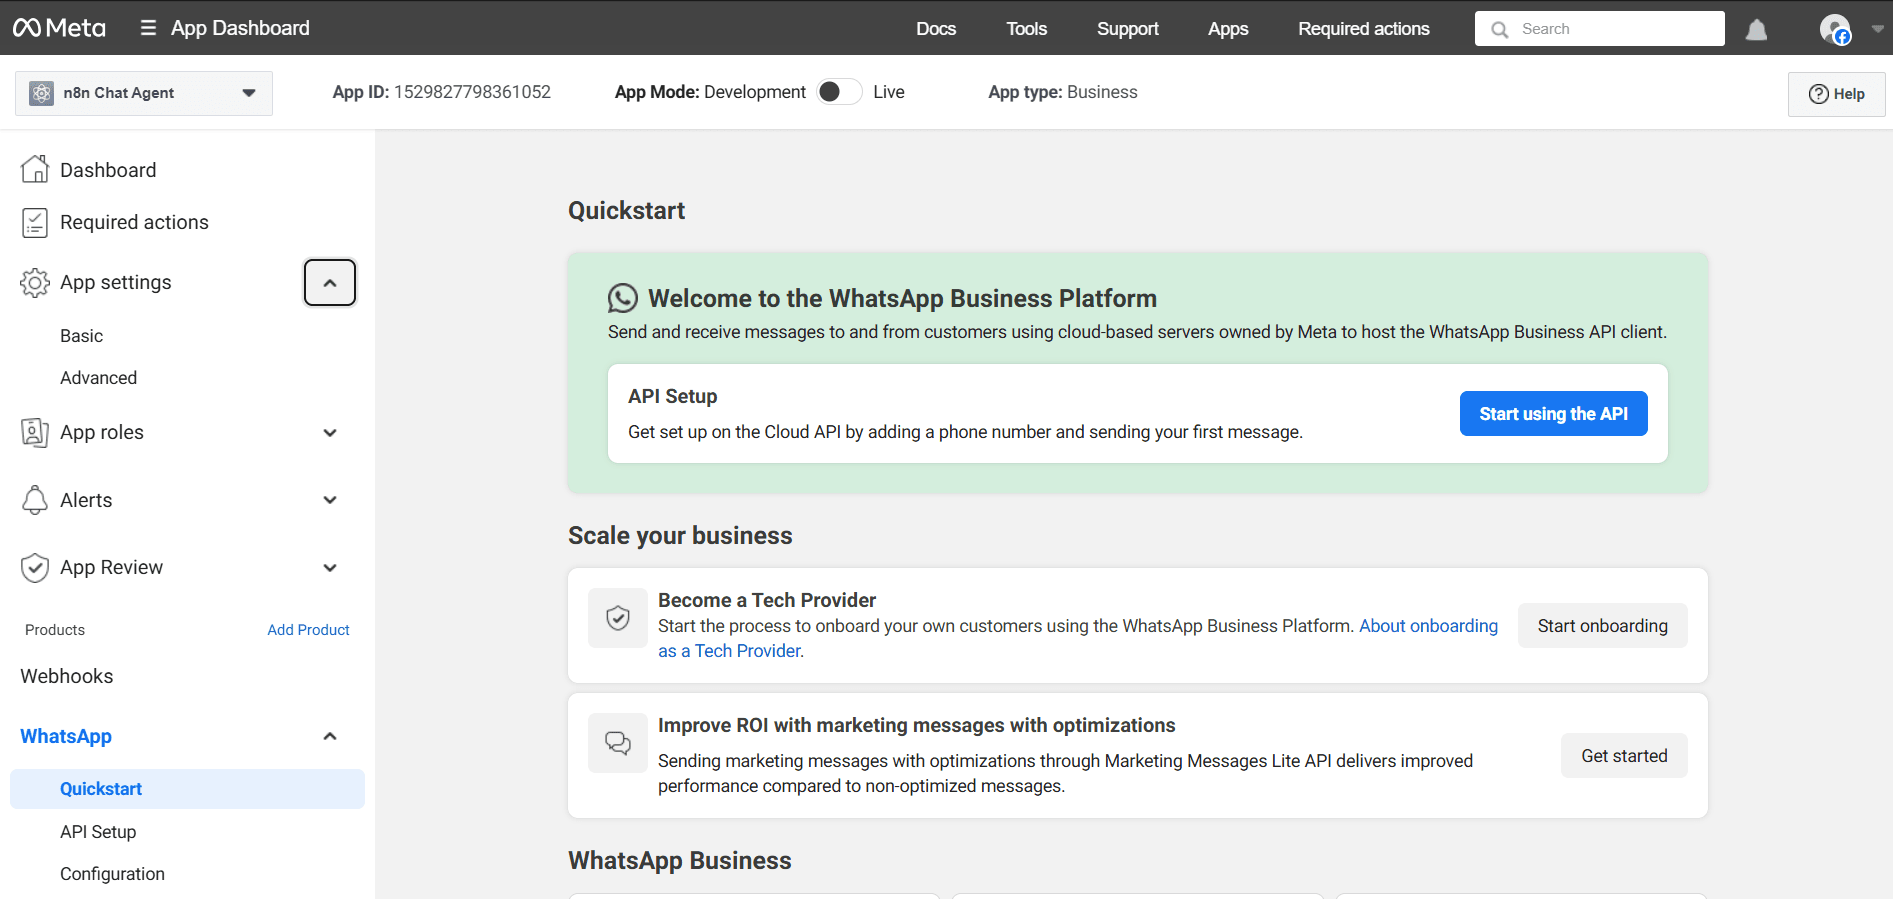
- Click Set up on WhatsApp.
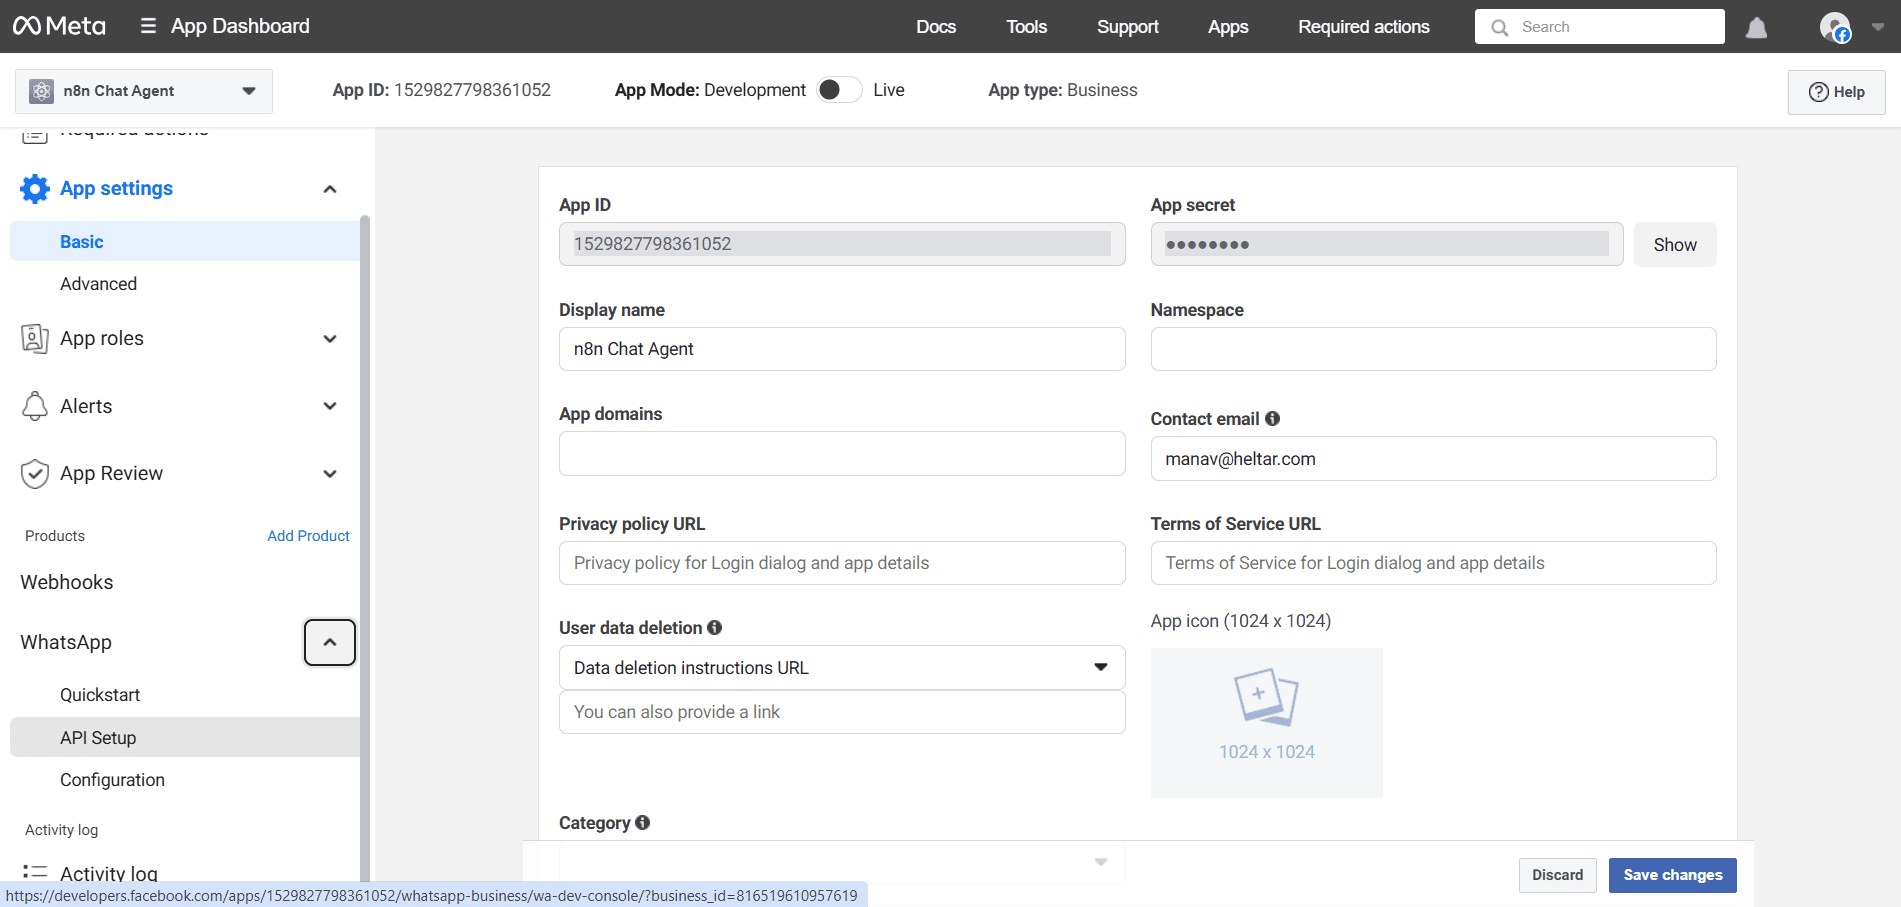
- Go to App settings > Basic.
- Copy App ID to n8n Client ID
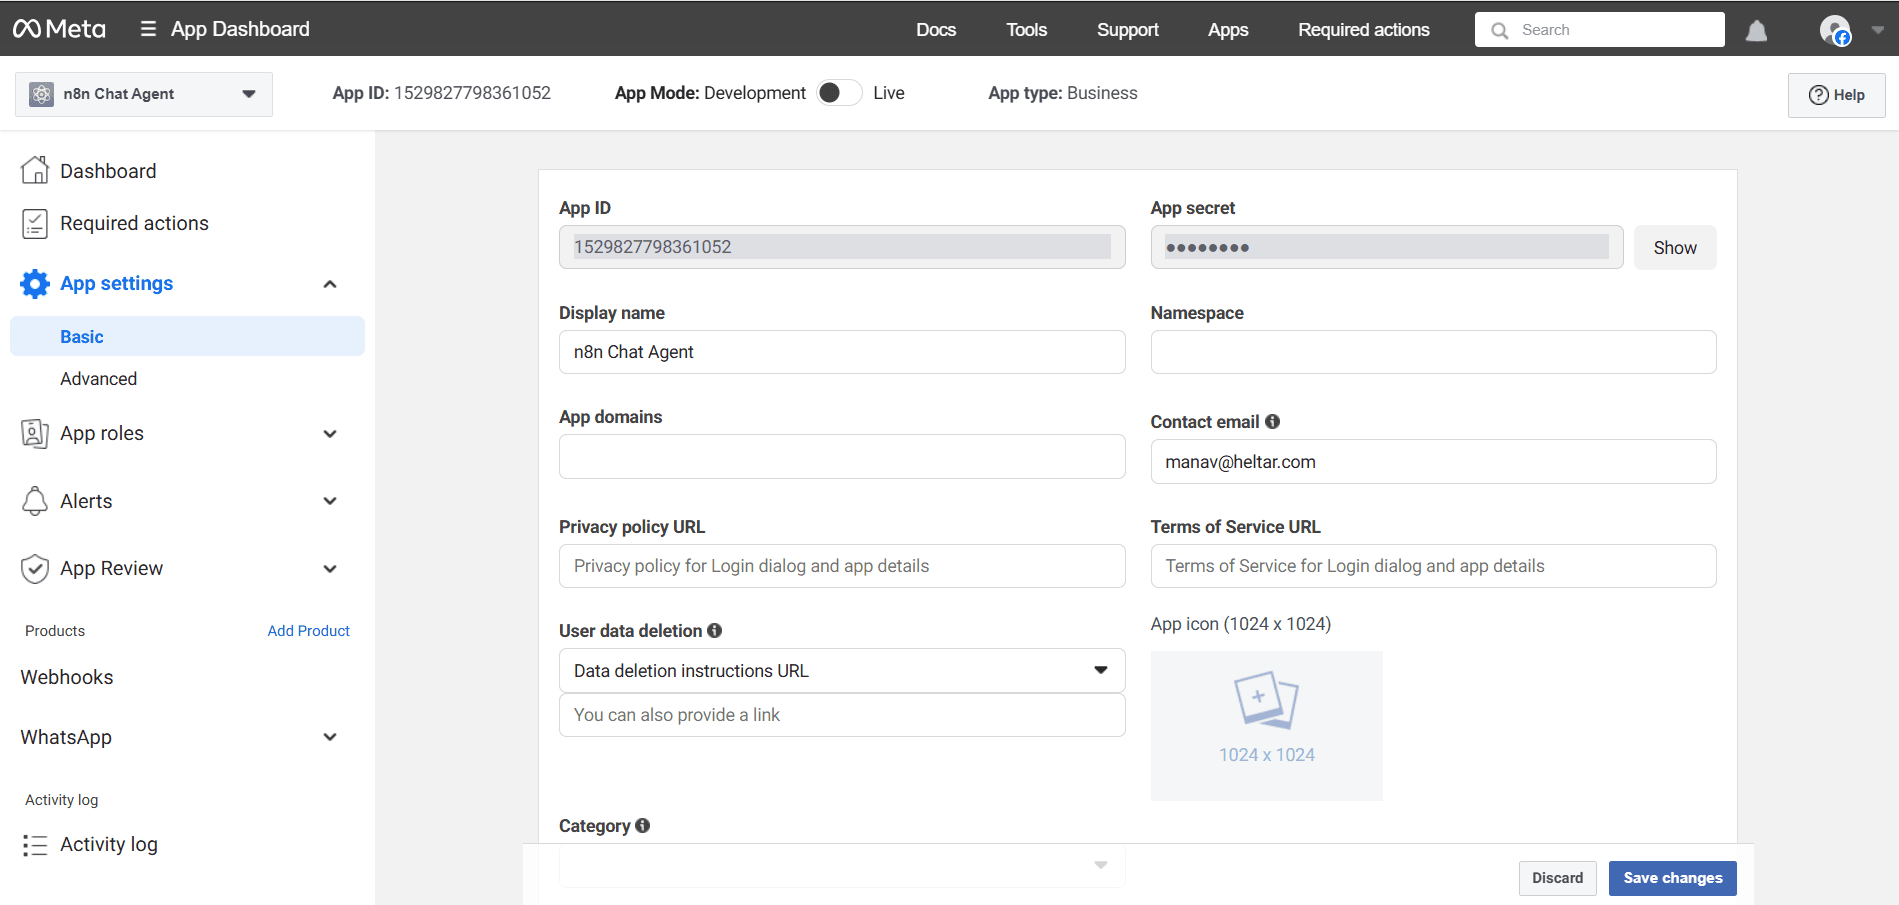
- Click Show to copy App secret to n8n Client Secret.
Save in n8n. You should see “Connection tested successfully".
That’s your inbound WhatsApp trigger ready.
Step 3 - Add the AI Agent in n8n
Click +, search Advanced AI, choose AI Agent.
Click Chat model at the bottom.
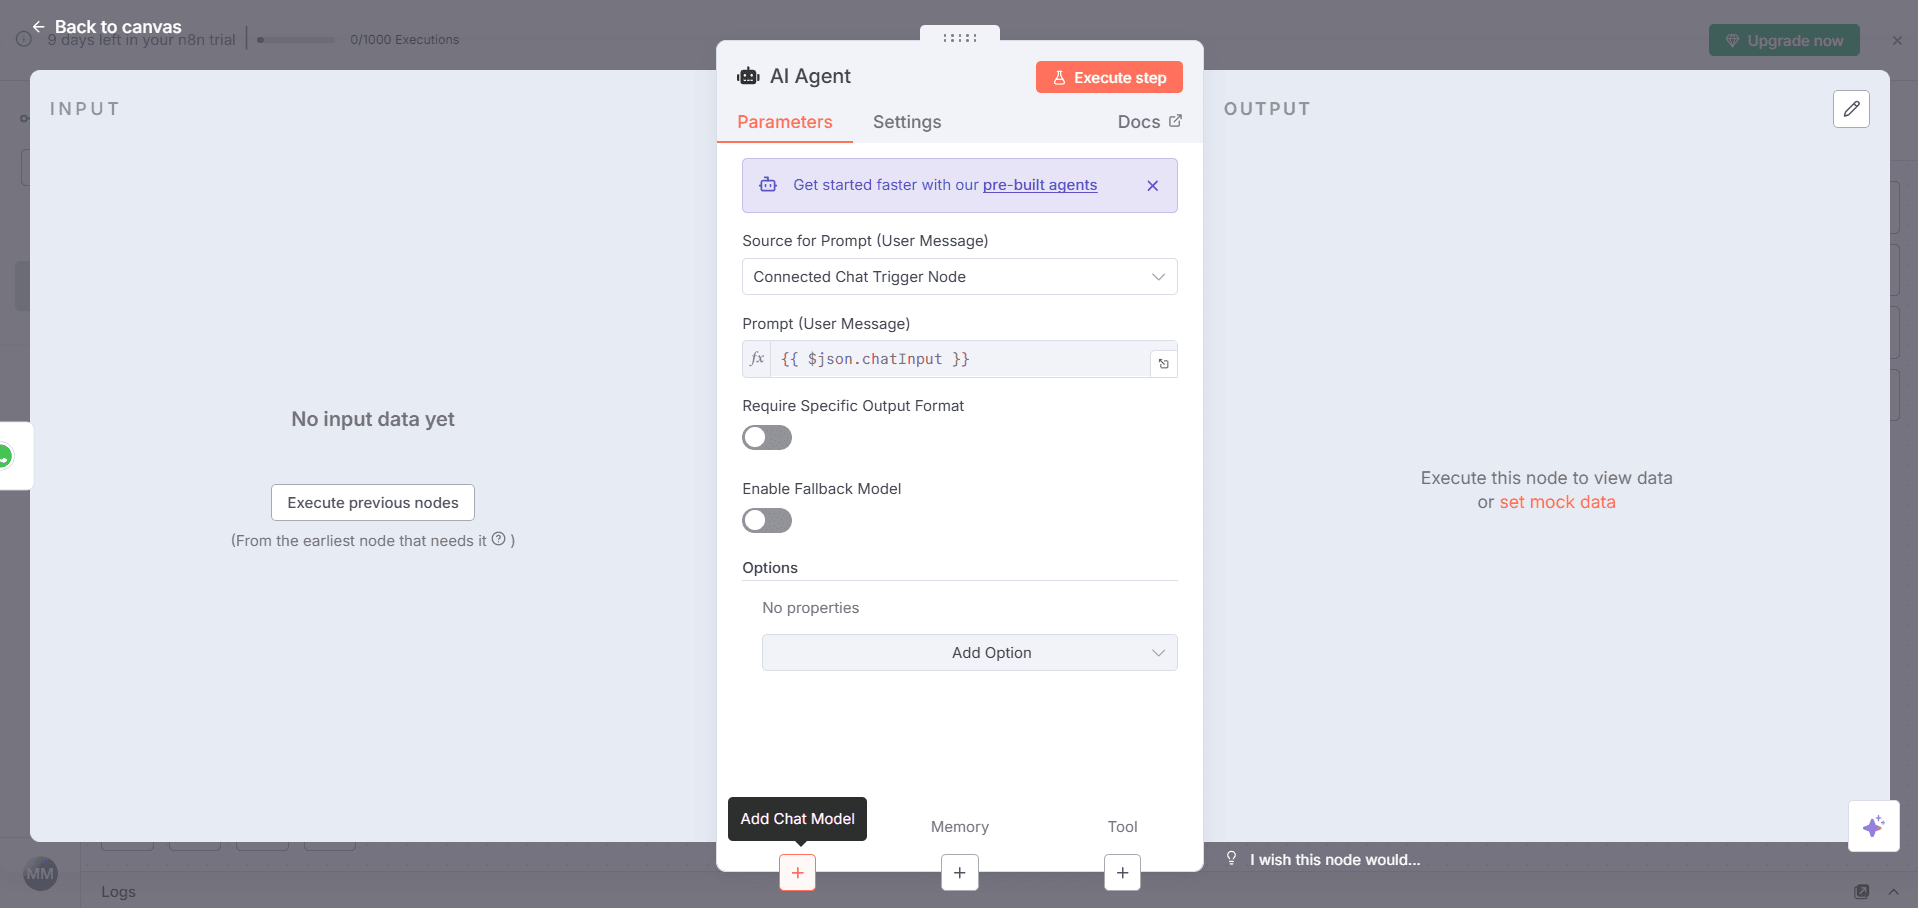
In Model provider, pick OpenAI (you can change this later).
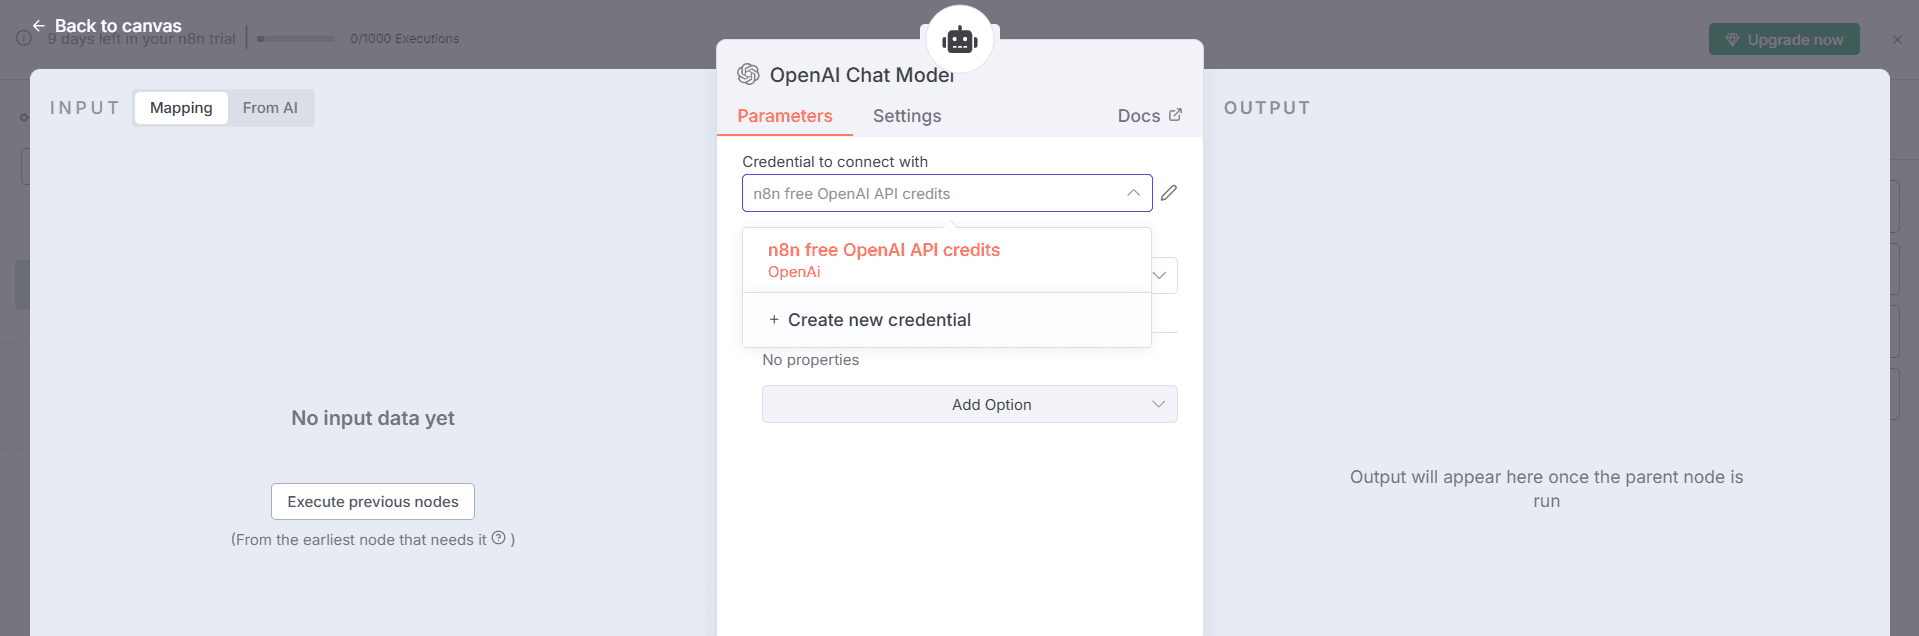
Click Connect credential > Create new.
Paste your OpenAI API key, then Save.
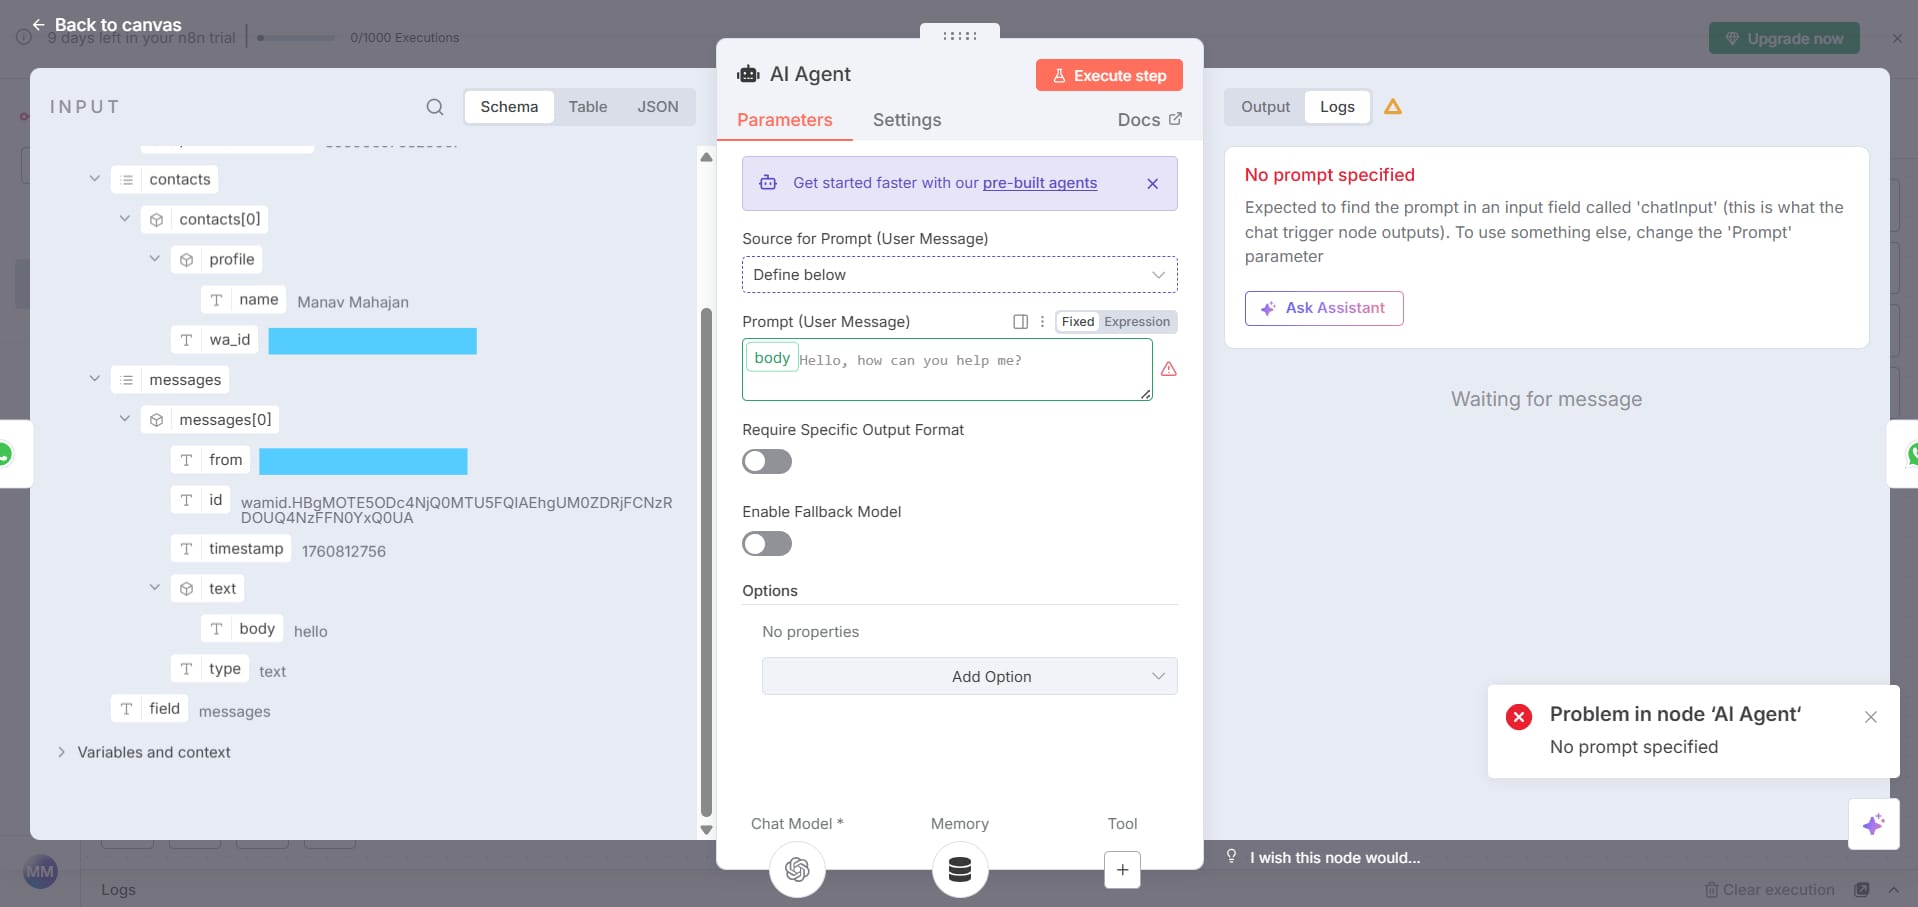
After you execute the previous nodes once, make the following changes. Select Source for Prompt as 'Define Below' and add the element 'Body' in the option Prompt (User Message). Don't be worried if you do not see the option to do this right now, you could come back and change this later.
Step 4 - Give the agent short-term memory
Click +, search Window Buffer/Simple Memory.
Place it between the trigger and the AI Agent output path, or connect it as an input to the Agent, depending on your layout. The idea is the Agent reads and writes to this memory.
Set the Session ID to the user’s number
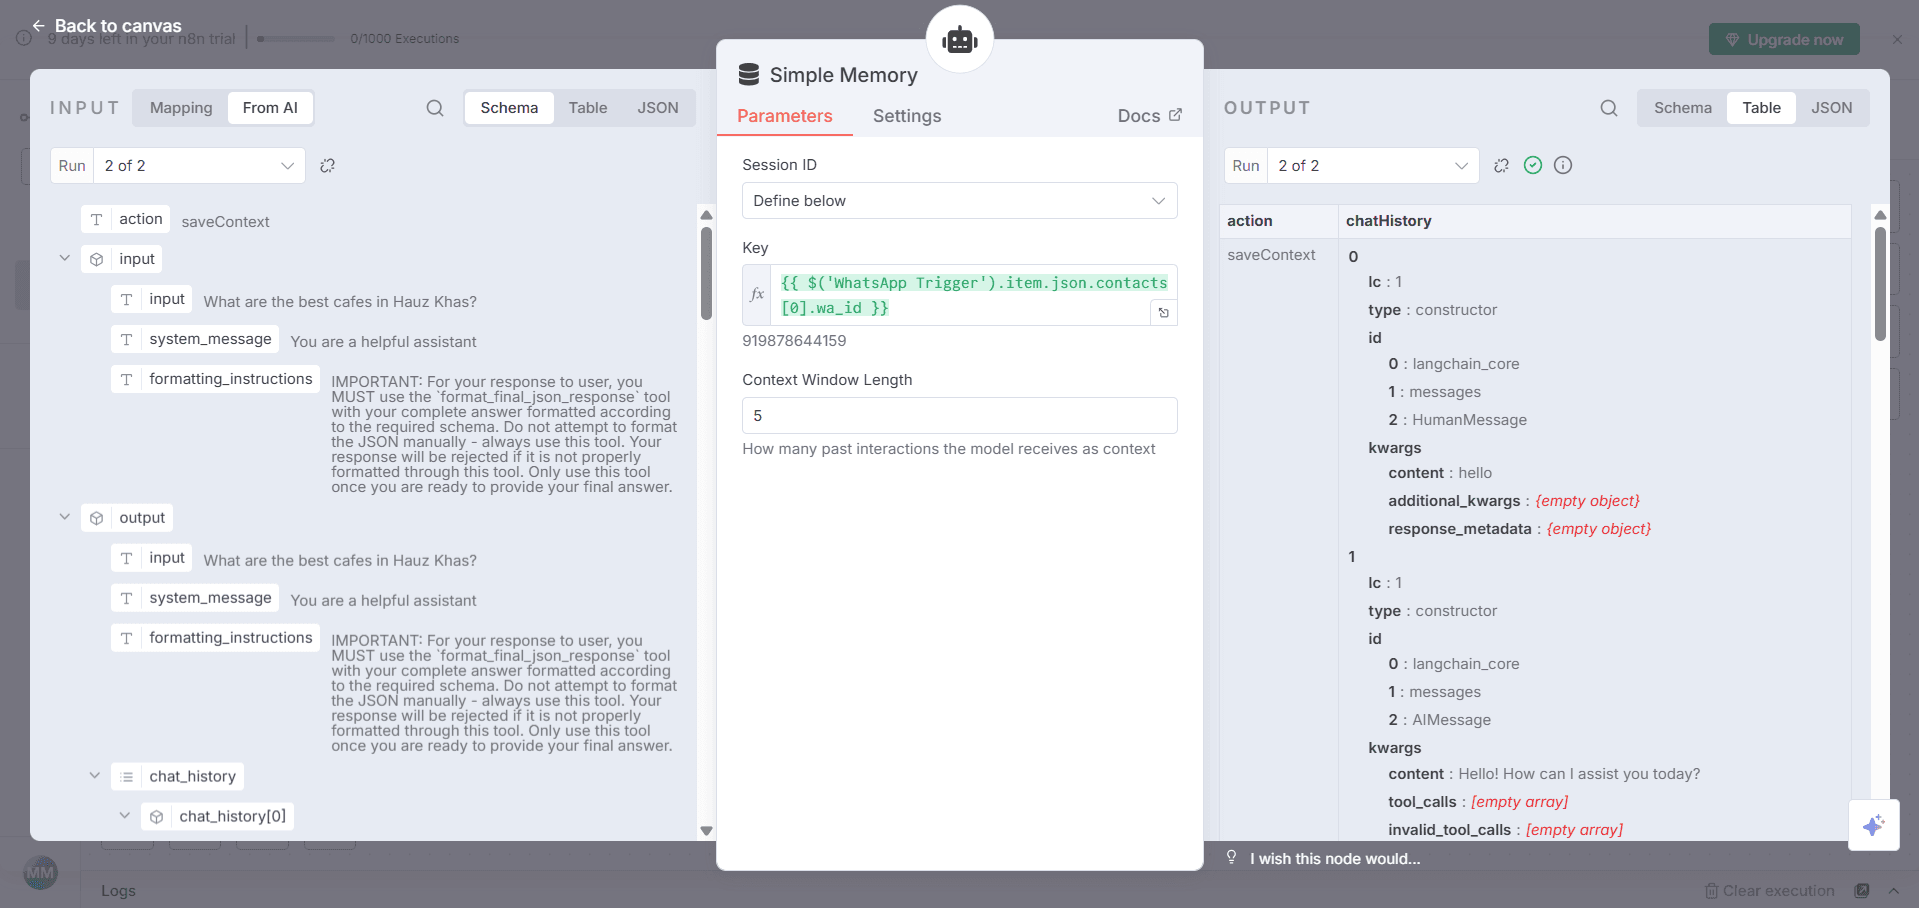
This lets the agent remember each user’s thread.
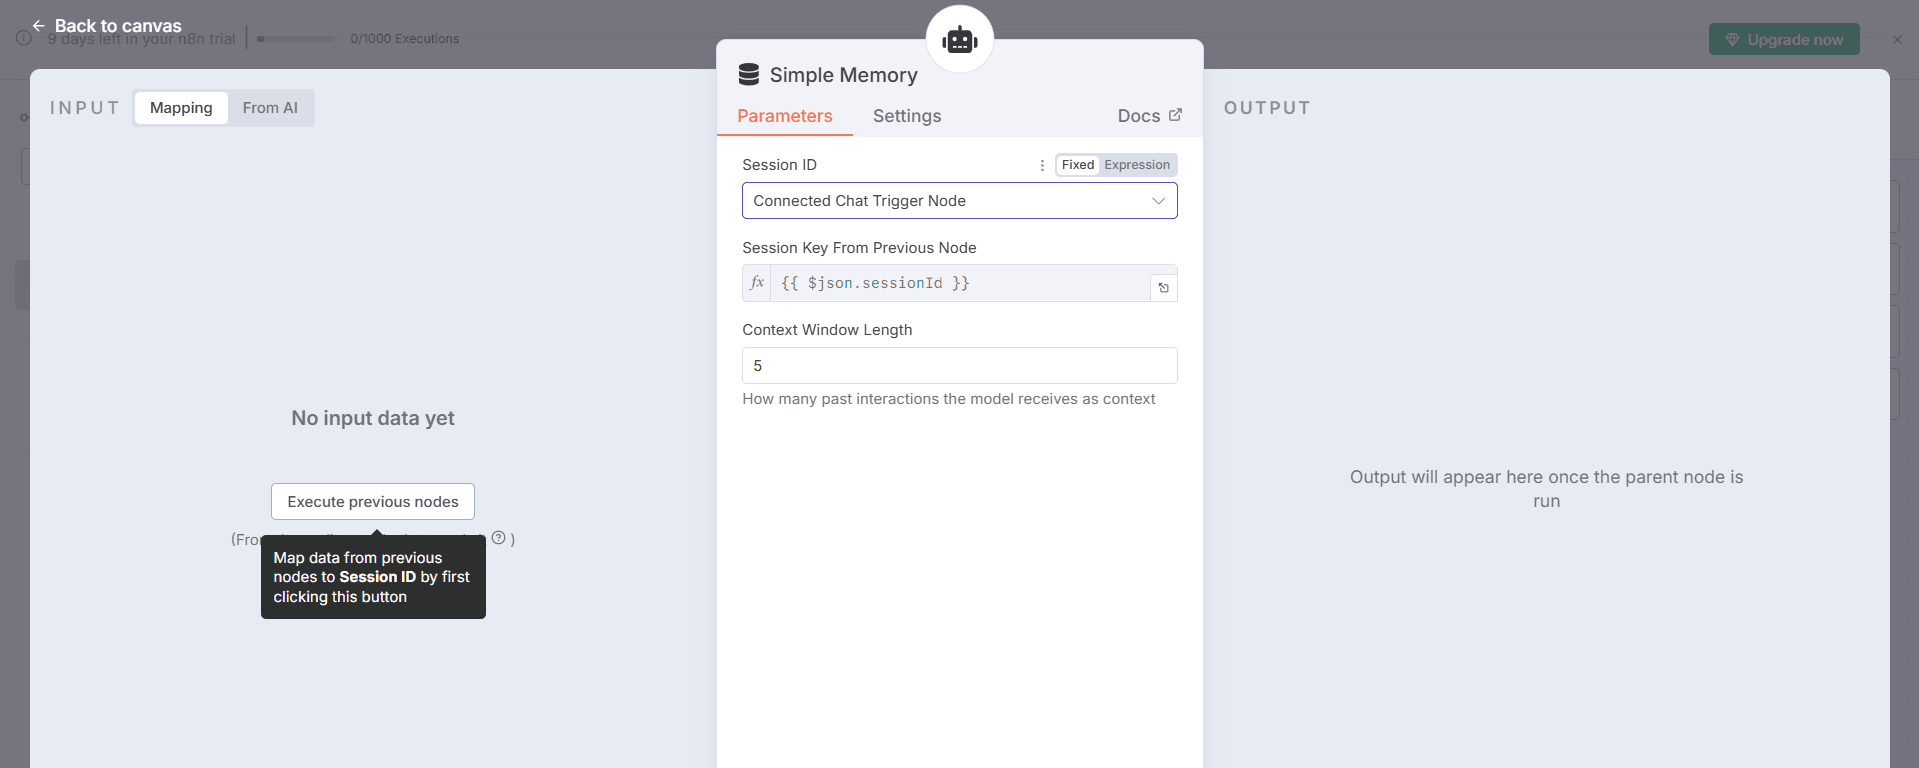
In Window Buffer/Simple Memory:
Set Session ID to Define below.
Click Expression and paste this:
{ { $('WhatsApp Trigger').item.json.contacts[0].wa_id } }
Use the exact node name you set earlier, here it is 'WhatsApp Trigger'.
Keep Window size small at first, for example 5 messages.
Step 5 - Add WhatsApp sender in n8n
Click +, search WhatsApp Business Cloud, choose Send a message.
This node pushes replies back to the user.
Create credentials for the sender
This time n8n asks for Access token and Business account ID.
Get them from Meta:
In your app’s left sidebar, click WhatsApp > API Setup.
Use the provided test phone number for now.
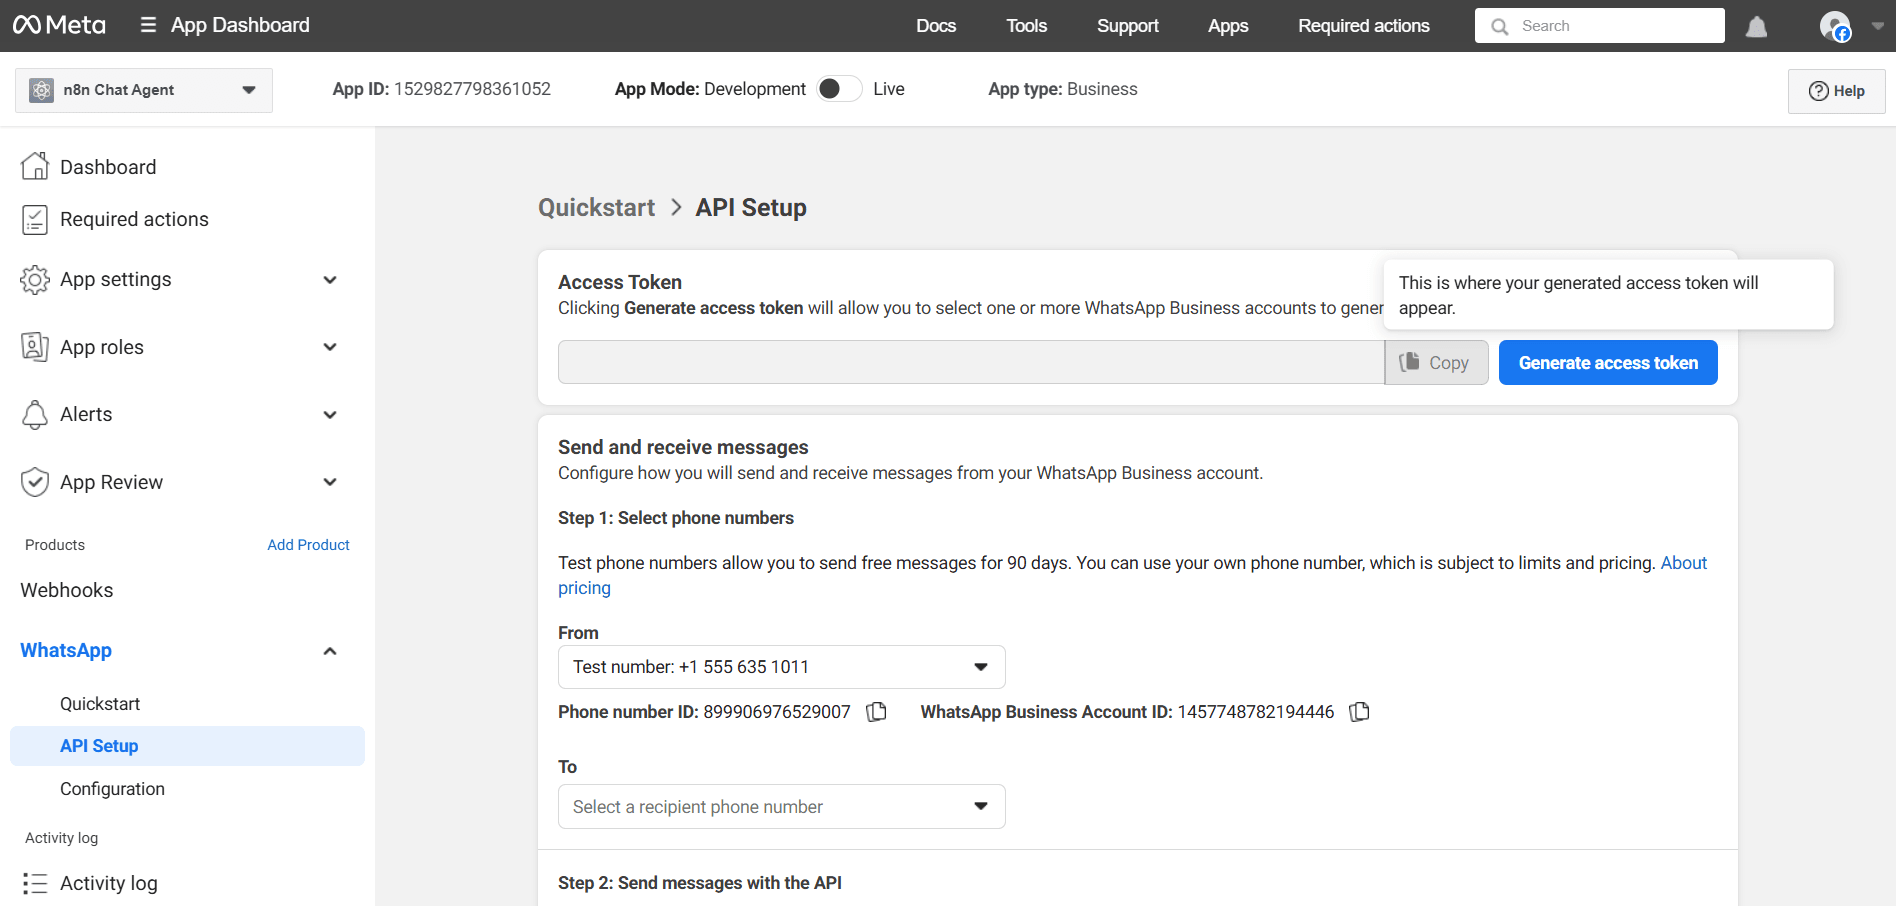
Click Generate access token. Copy it to n8n Access token.
Copy WhatsApp Business Account ID from the same page to n8n Business account ID.
Save. You should see “Connection tested successfully”.
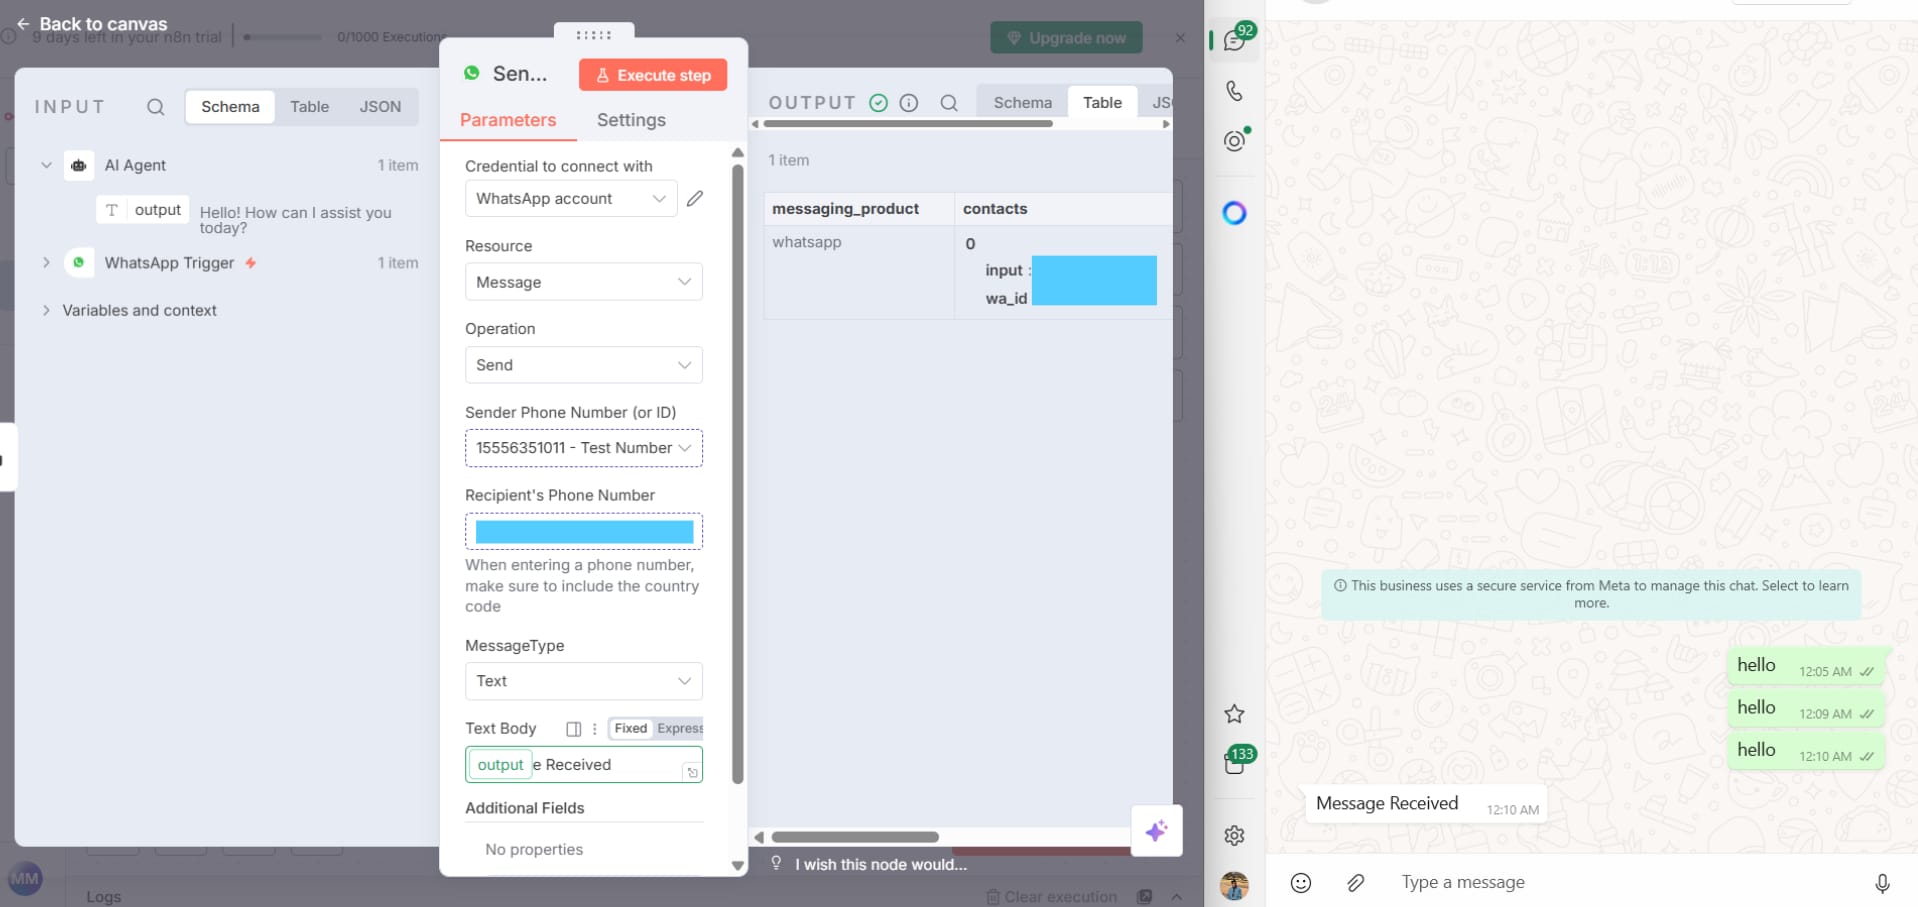
Configure the message
Sender phone number: pick the test number from the dropdown.
Recipient phone number: enter your phone number with country code, no plus sign issues, for example 14155550123.
Text body: put a placeholder like 'Message Received' for the first test.
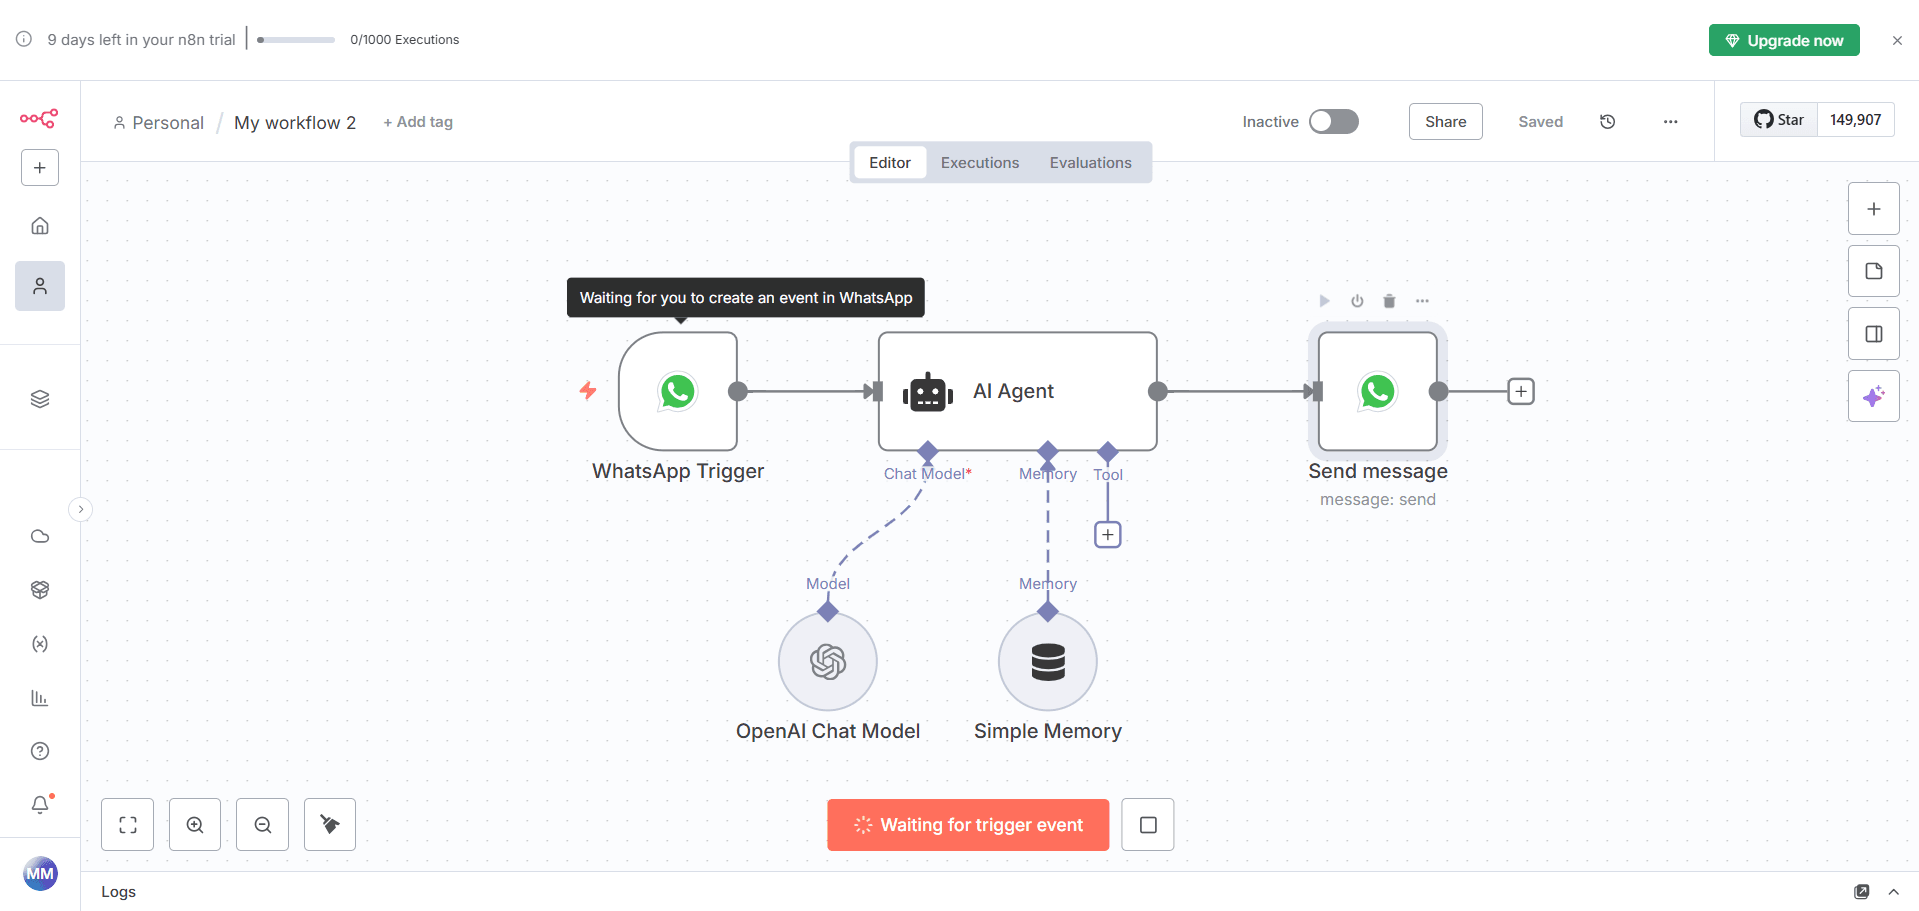
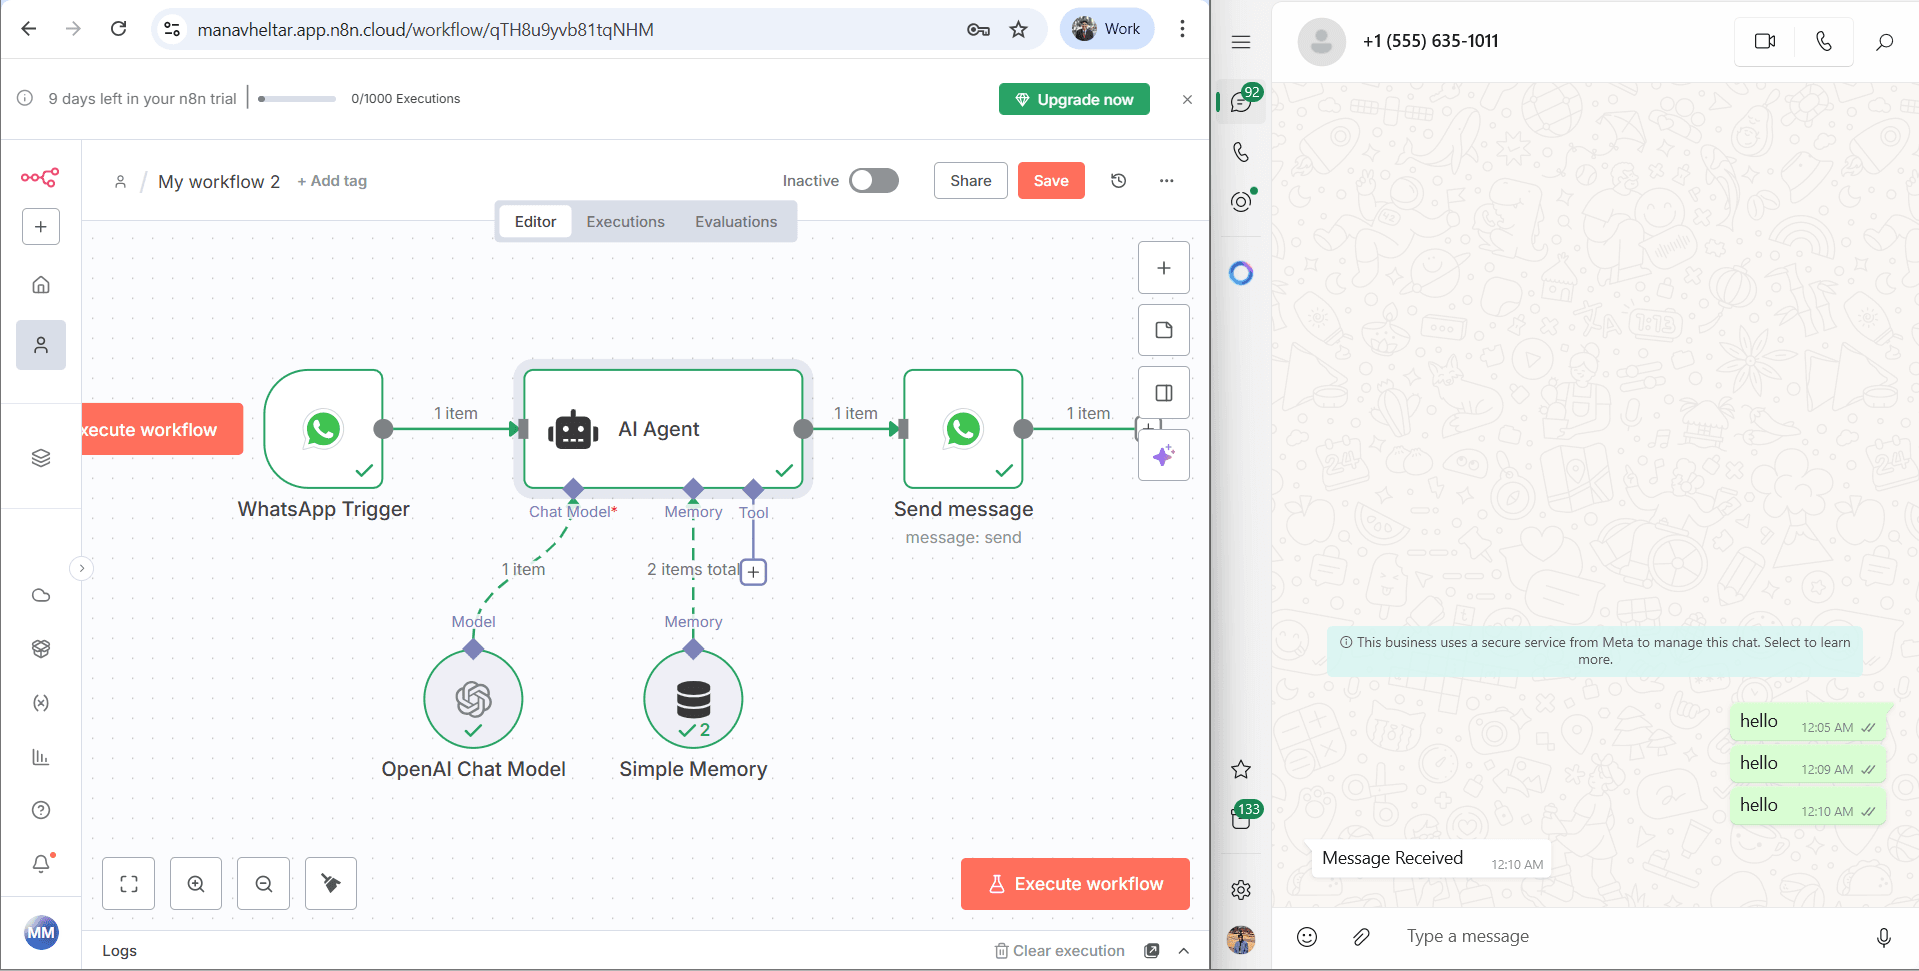
Step 6 - Wire it up
A clean first pass looks like:
[WhatsApp Message trigger] -> (optional IF check) -> [Window Buffer/ Simple Memory] -> [AI Agent] -> [WhatsApp Send]
To add the safety check:
Click +, search IF.
Set Condition to String exists.
Drag the body field from the trigger output into the left side of the condition.
True path goes to Memory then AI Agent then Send.
False path can go to a No-op or stop.
Step 7 - Test the inbound trigger
In the trigger node, click Execute workflow.
Open WhatsApp on your phone or desktop.
Start a chat to the test number shown in Meta’s API Setup page.
Send a simple text, say “hello”.
You should see the trigger fire in n8n.
The sender node will post your placeholder text “Message Received” back to you.
If that works, the pipe is healthy.
Step 8 - Switch the reply to the AI output
Open the WhatsApp Send node.
Clear the hardcoded
success.Click into Text body, then from the AI Agent node, drag the output variable into the field.
Save.
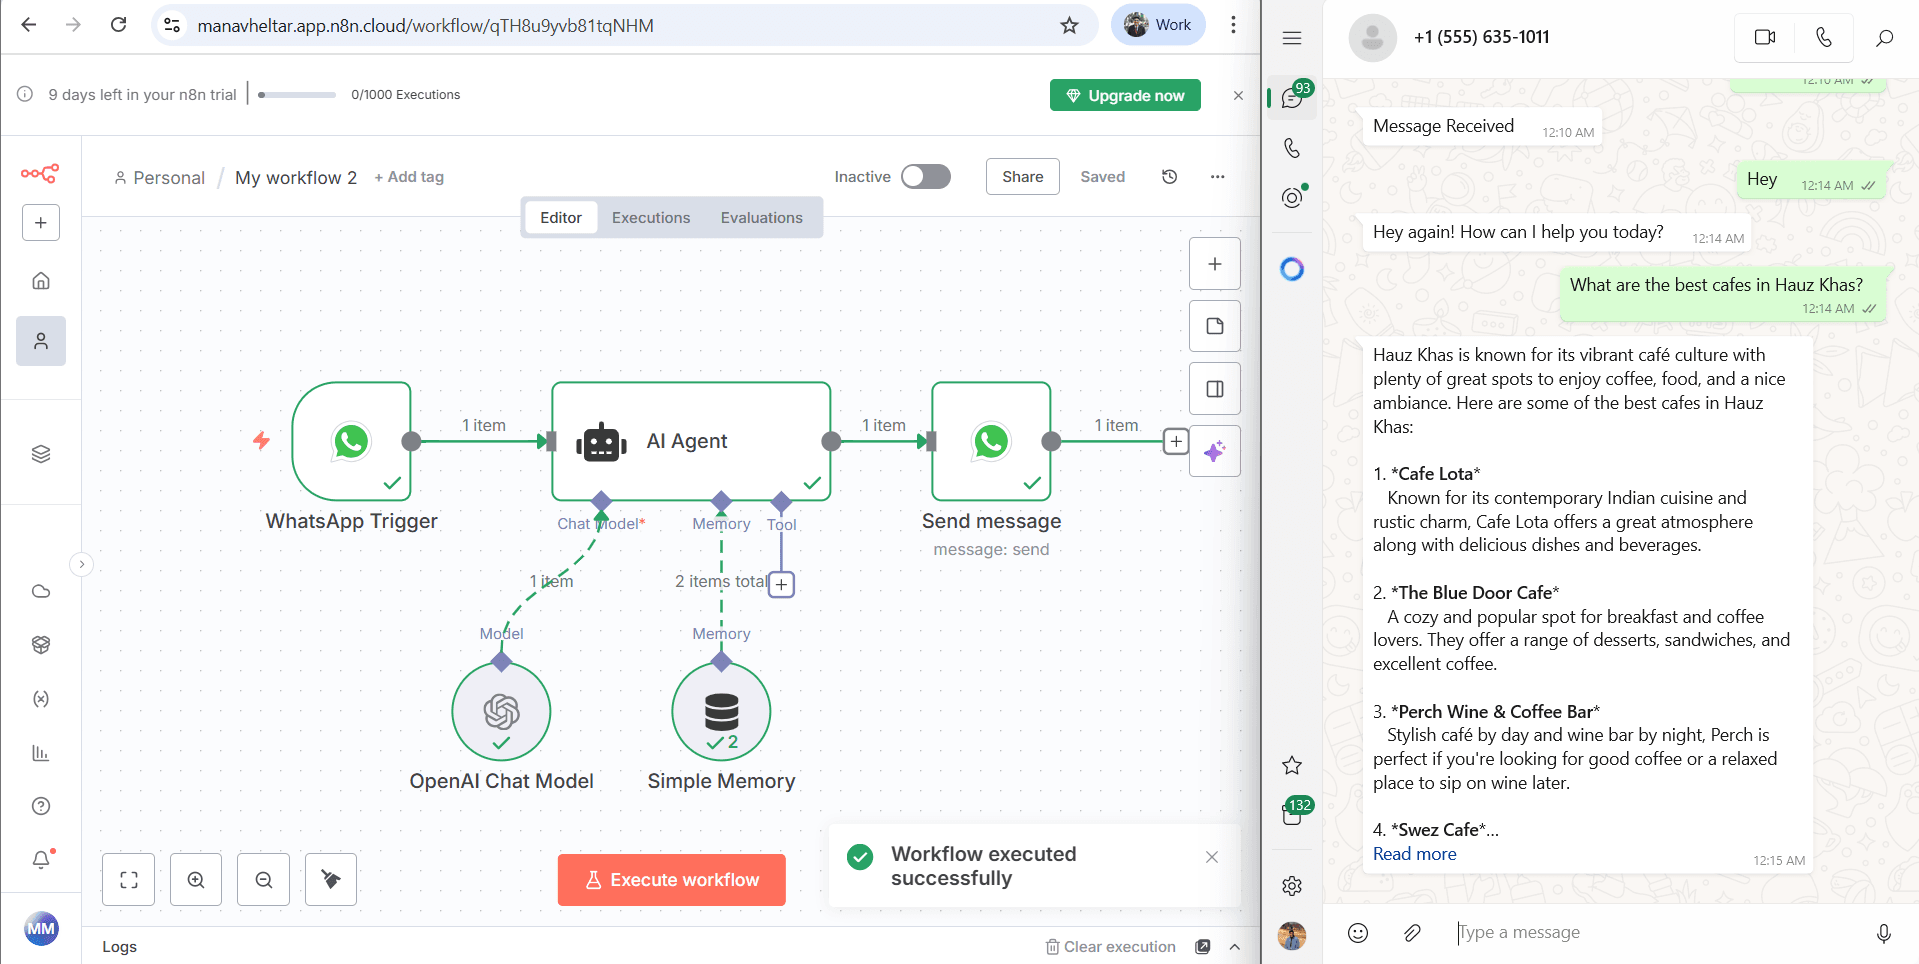
Test again:
Say “Hey”.
You should get a real AI reply in WhatsApp.
Try a follow up:
Ask a second question, for example: “Which one would you recommend” after the agent lists options.
Memory should keep context and give a sensible follow up.
Step 9 - Activate the workflow
Toggle the workflow from Inactive to Active.
Now you do not need to click Test each time.
New WhatsApp messages will flow through on their own.
Troubleshooting!
No reply shows up
Check Executions in n8n for errors.
Confirm the IF node is getting a body string.
Confirm the Send node has the right Sender and Recipient numbers.
Regenerate the Access token if it expired.
Memory not working
Make sure your Session ID expression points at the user’s number and uses the exact trigger node name.
Keep Window size small at first.
Trigger never fires
Recheck the WhatsApp Message trigger credential (App ID and App Secret).
Make sure you are messaging the test number shown in API Setup.
Add common automations
You now have the core loop. Here are simple adds you can make in minutes:
Keyword router
Add a Switch node after the trigger. Route “help”, “pricing”, “status”, etc, to different replies or subflows.Office hours
Add Schedule or a Function that checks time. If outside hours, send a polite note and log the lead.Lead logging
Add a Google Sheets or Airtable node. Save from, body, and timestamp for every message.Fallback to human
If AI confidence is low, send a handover message and push the chat to your help desk.Buttons and templates
Use WhatsApp template messages for menus, OTPs, and order updates. In n8n, choose a template in the send node and pass variables.
Actually Deploying the bot full time?
Long-lived token
The short token from API Setup expires. In Meta Business Settings, add a System User, assign it to your app, create a Permanent token with WhatsApp permissions, and store it in n8n. Rotate it on a schedule.Real phone number
Add a real business number in WhatsApp > API Setup. Complete display name and business verification if asked.24-hour window
WhatsApp allows free form replies within 24 hours of the user’s last message. After 24 hours, use approved templates to re-engage.Opt-in and content rules
Only message users who have opted in. Avoid restricted content. Keep logs.Secrets management
Store all tokens and keys in n8n credentials, not in plain text fields.Error alerts
Add an Error workflow in n8n that sends you an email or Slack message when executions fail.
Is n8n-only WhatsApp automation feasible for real businesses?
Short answer, No for most teams. n8n is great for a demo or a tiny workflow, but day to day business needs are bigger and stricter.
Why n8n alone breaks in practice?
You need many flows at once, not one bot. Real chats fan out by keyword, menu, language, locale, and stage. Keeping dozens of n8n flows in sync is hard and fragile.
You need bulk and broadcast. WhatsApp allows bulk only with approved templates and user opt-ins. Managing templates, approvals, variables, and opt-outs inside n8n quickly becomes messy.
You must follow the 24-hour service window. After 24 hours you can reply only with templates, managing and keeping track of this while automating with n8n is hard.
Sales needs a shared inbox. n8n is a workflow tool, not a team inbox. You cannot assign chats, add notes, tag leads, or see who replied last without building a lot around it.
You need reporting and control. Delivery, read rates, template failures, number quality, blocks, consent status, audit trails, and retries are all required. Stitching this in n8n is heavy.
Why businesses need a provider to do this for them?

Heltar is a WhatsApp Business API provider built for these needs.
Shared inbox, roles, and assignments so sales can work from one place.
Automation inside the inbox, plus quick setup for keywords, menus, and forms. You can create a WhatsApp chatbot using a drag-and-drop, no-code chatbot builder. Just one AI prompt, and you have your automation ready to be deployed. You can't get this luxury on n8n.
Template workflows for approval, variables, and safe bulk sends. You create templates and get them approved within seconds, ready to be launched as part of bulk messaging campaigns.
24-hour window guardrails that auto enforce message type rules.
Campaigns and segments with schedules and rate control. Schedule and Fire any campaign in less than a minute, marketing made simple!
Live reports for delivery, reads, failures, leads, and outcomes.
CRM and data hooks without glue code.
Token and number hygiene handled with alerts and retries.
Best of both worlds
You can still use n8n for back-office logic, data cleaning, and custom steps, while Heltar handles WhatsApp delivery, inbox, teams, and compliance. That split keeps your flows flexible and your chat stack stable.
Bottom line
If you are testing, n8n alone is fine. If you are running sales or support, use a WhatsApp Business API provider. Heltar gives you the inbox, automation, bulk, and controls you need, so your team focuses on closing leads, not babysitting bots.